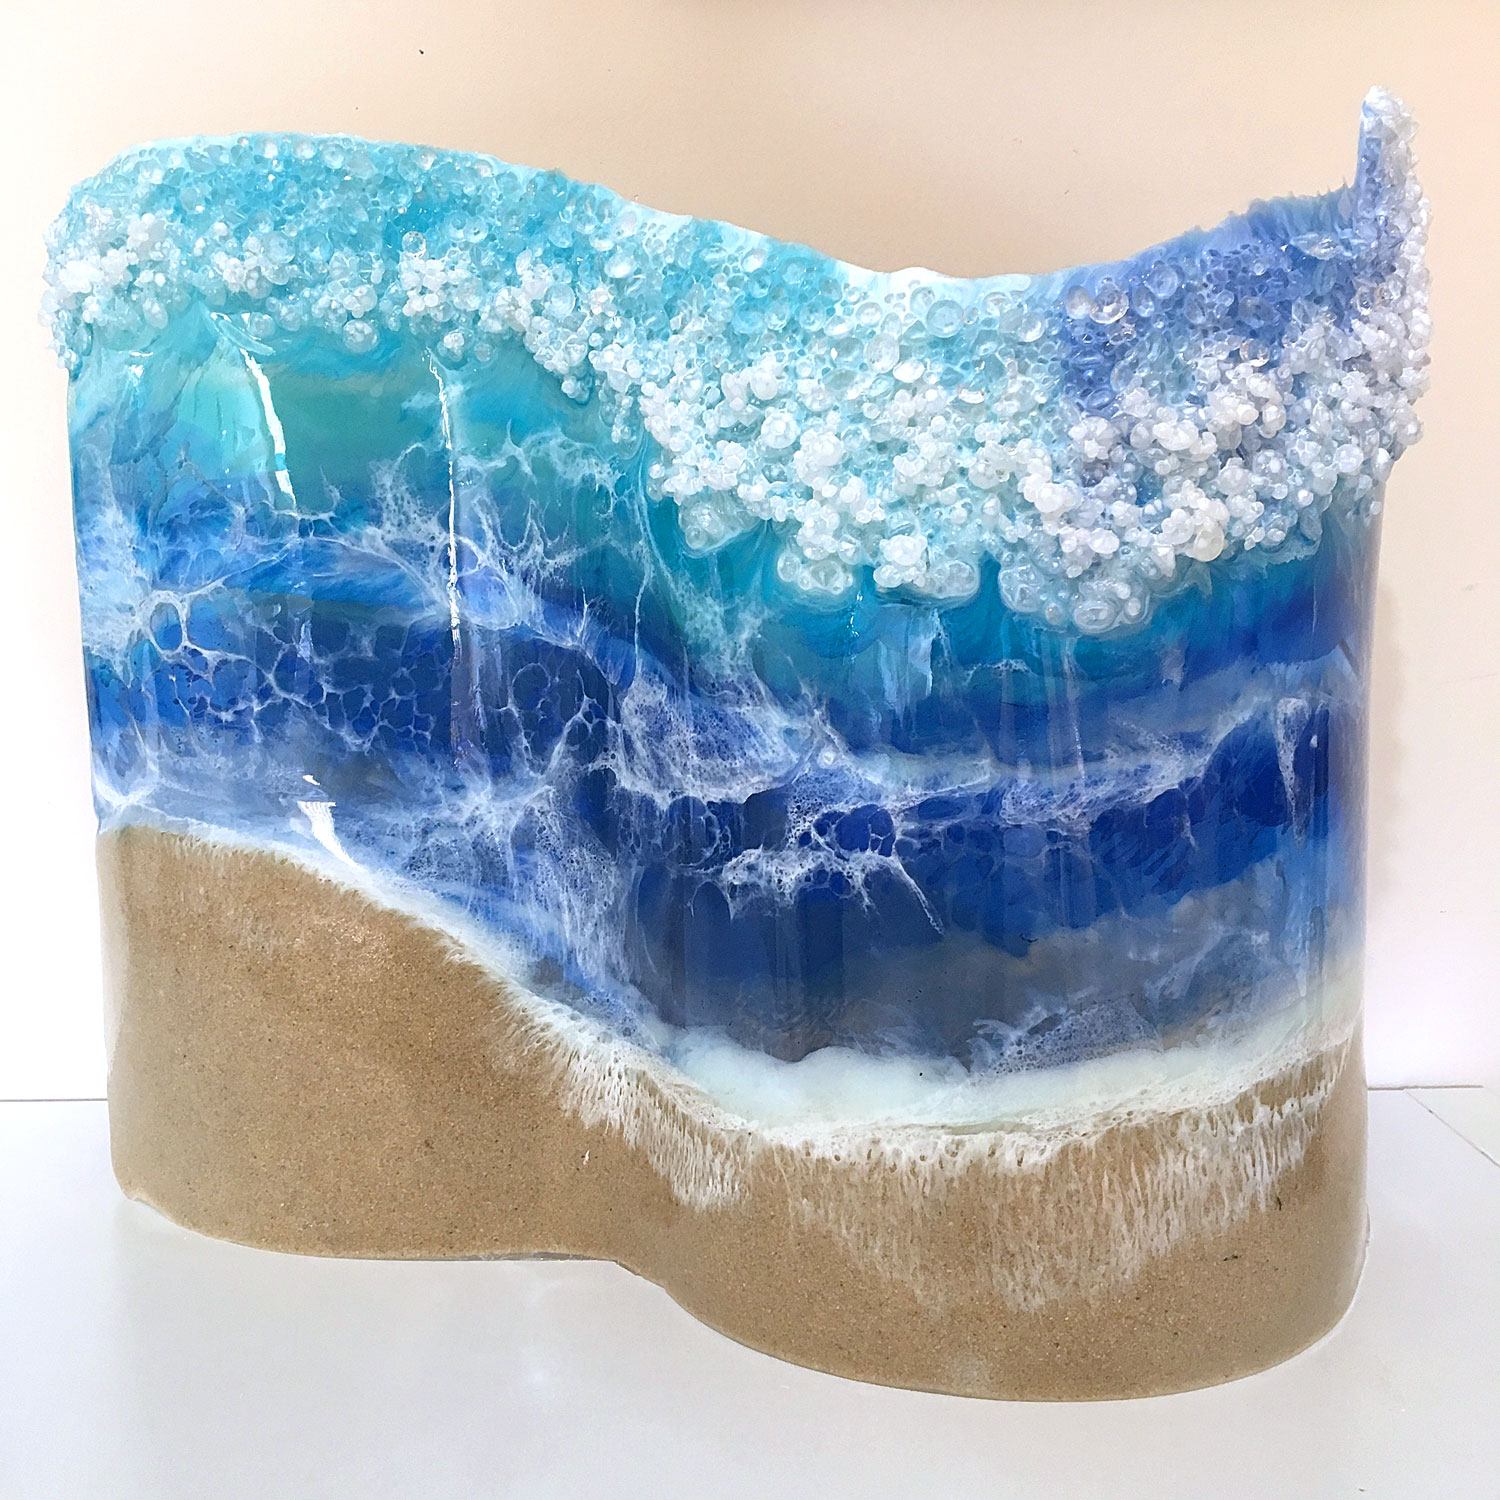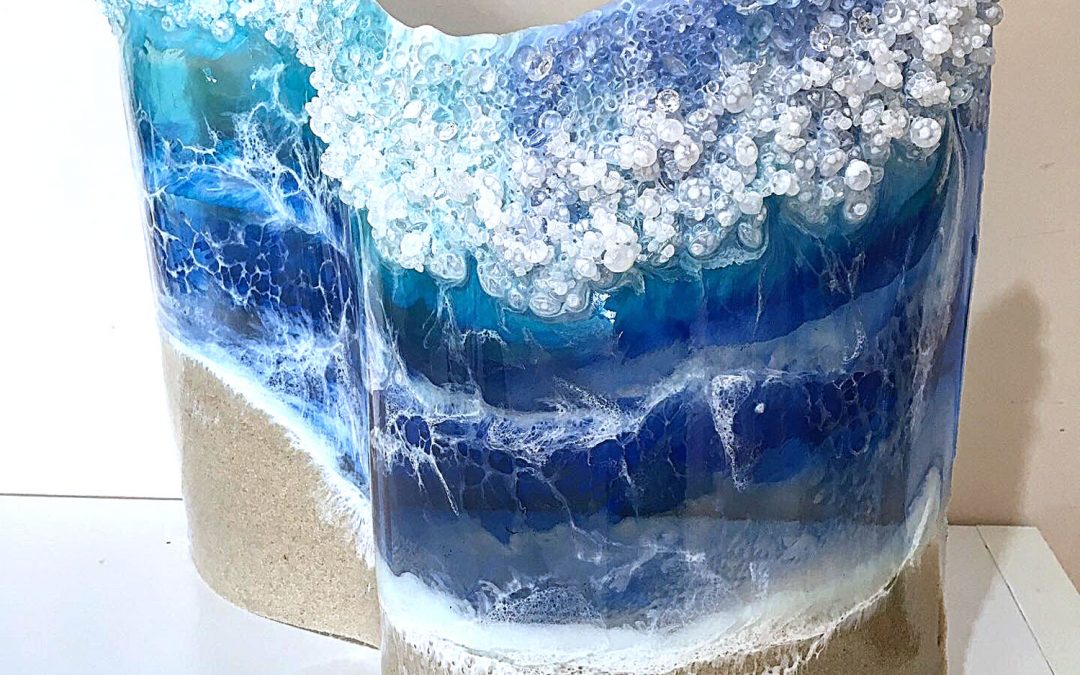
For this project, I wanted to recreate a beach scene only this time incorporate it into a wave shape and turn it into a free-standing sculpture. Using a similar process to my previous resin beach scenes, I used real sand for the base and tinted the resin with small amounts of India Ink.
For the top, I mixed a small amount of white resin with the Acrylic Diamonds and spooned them into shape for the wave. To achieve the white foamy waves, I poured a layer of clear before adding the white and blew it with the heat gun to get movement.
Finally, after leaving it to cure for a few hours (checking every hour) until it was no longer sticky and bent it over rolls of bubble wrap. It was then left to cure overnight.
For this project you will need:
- Silicone Pet Feeding Mat 30 x 40 cm: http://bit.ly/petfeedmat – Alternative Product: Silicone Swiss Roll Mat: https://amzn.to/2HTa7Fh
- Sand: https://amzn.to/2Jsh6Eu – US | https://amzn.to/31Qfxqe – UK
- Liquid Glass Resin from U Resin: http://bit.ly/LiquidGlassResin
- India Ink: https://amzn.to/2TiyYDy – US | https://amzn.to/2Stcn8R – UK | https://amzn.to/2JIzY1c – AU
- Acrylic Diamonds: http://bit.ly/acrylicdiamonds – Alternative Product: https://amzn.to/2Y7pVJi – US | https://amzn.to/2XWbdUt – UK
- Cellophane Wrap: https://amzn.to/2YkX6x0 – US | https://amzn.to/2NYjEPi – UK | https://amzn.to/2XJhfMN – AU (optional for a shiny finish)
- Bubble Wrap or something to bend your resin around
Books
The Essential Beginner’s Guide to Resin Art Techniques
eBook version: (http://bit.ly/resinguide)
Paperback version: https://amzn.to/2XEmqxn (US)*
https://amzn.to/2NMKAkY (UK)*
*Sales from this guide also go towards funding my YouTube resin tutorials.
Thank you for your support.
* Note – As an Amazon Associate, I earn from qualifying purchases. I realise that not everyone has access to the shops I have locally, so I have taken the time to find alternative products on Amazon and provide you with links. Please also note, I haven’t personally tried all of the product links, due to location, however, my aim is to help speed up your creative process by providing these links. Every time you click on a link and purchase a qualifying item, I receive a small commission, this payment helps to keep my tutorials free for you to watch.
If you would like to access my videos before everyone else, then please sign up to my newsletter: Sue Findlay Designs Newsletter
I hope this video gives you more ideas for bending resin.
I would love to see your creations, please join my Facebook Group: Resin and Mixed Media Art Tutorials, and share what you have made.