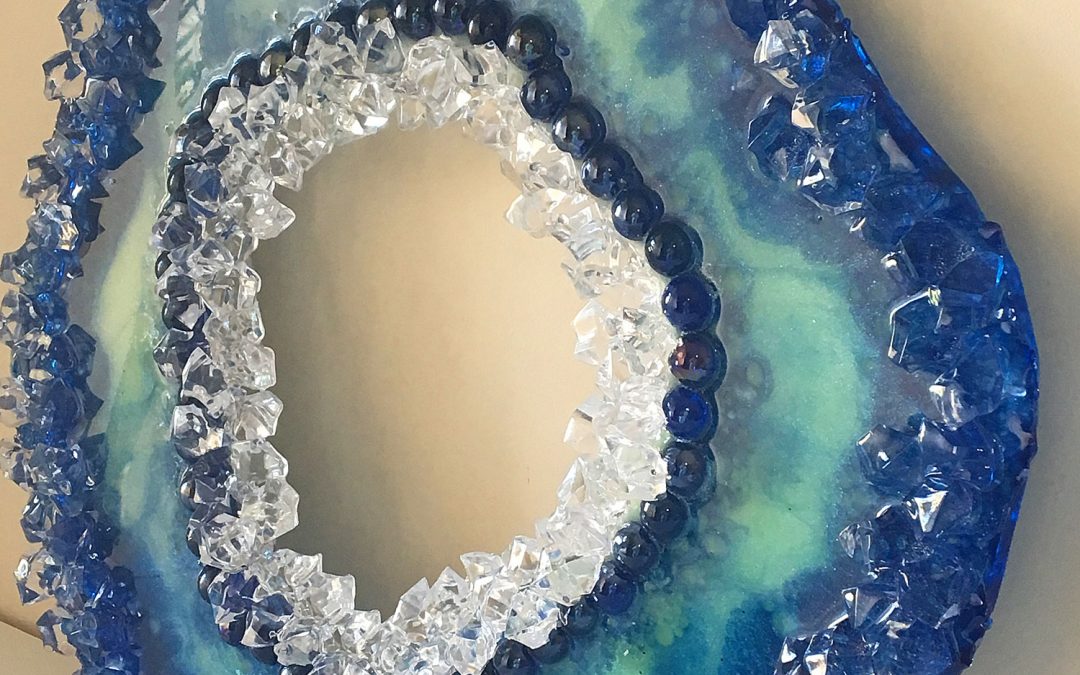
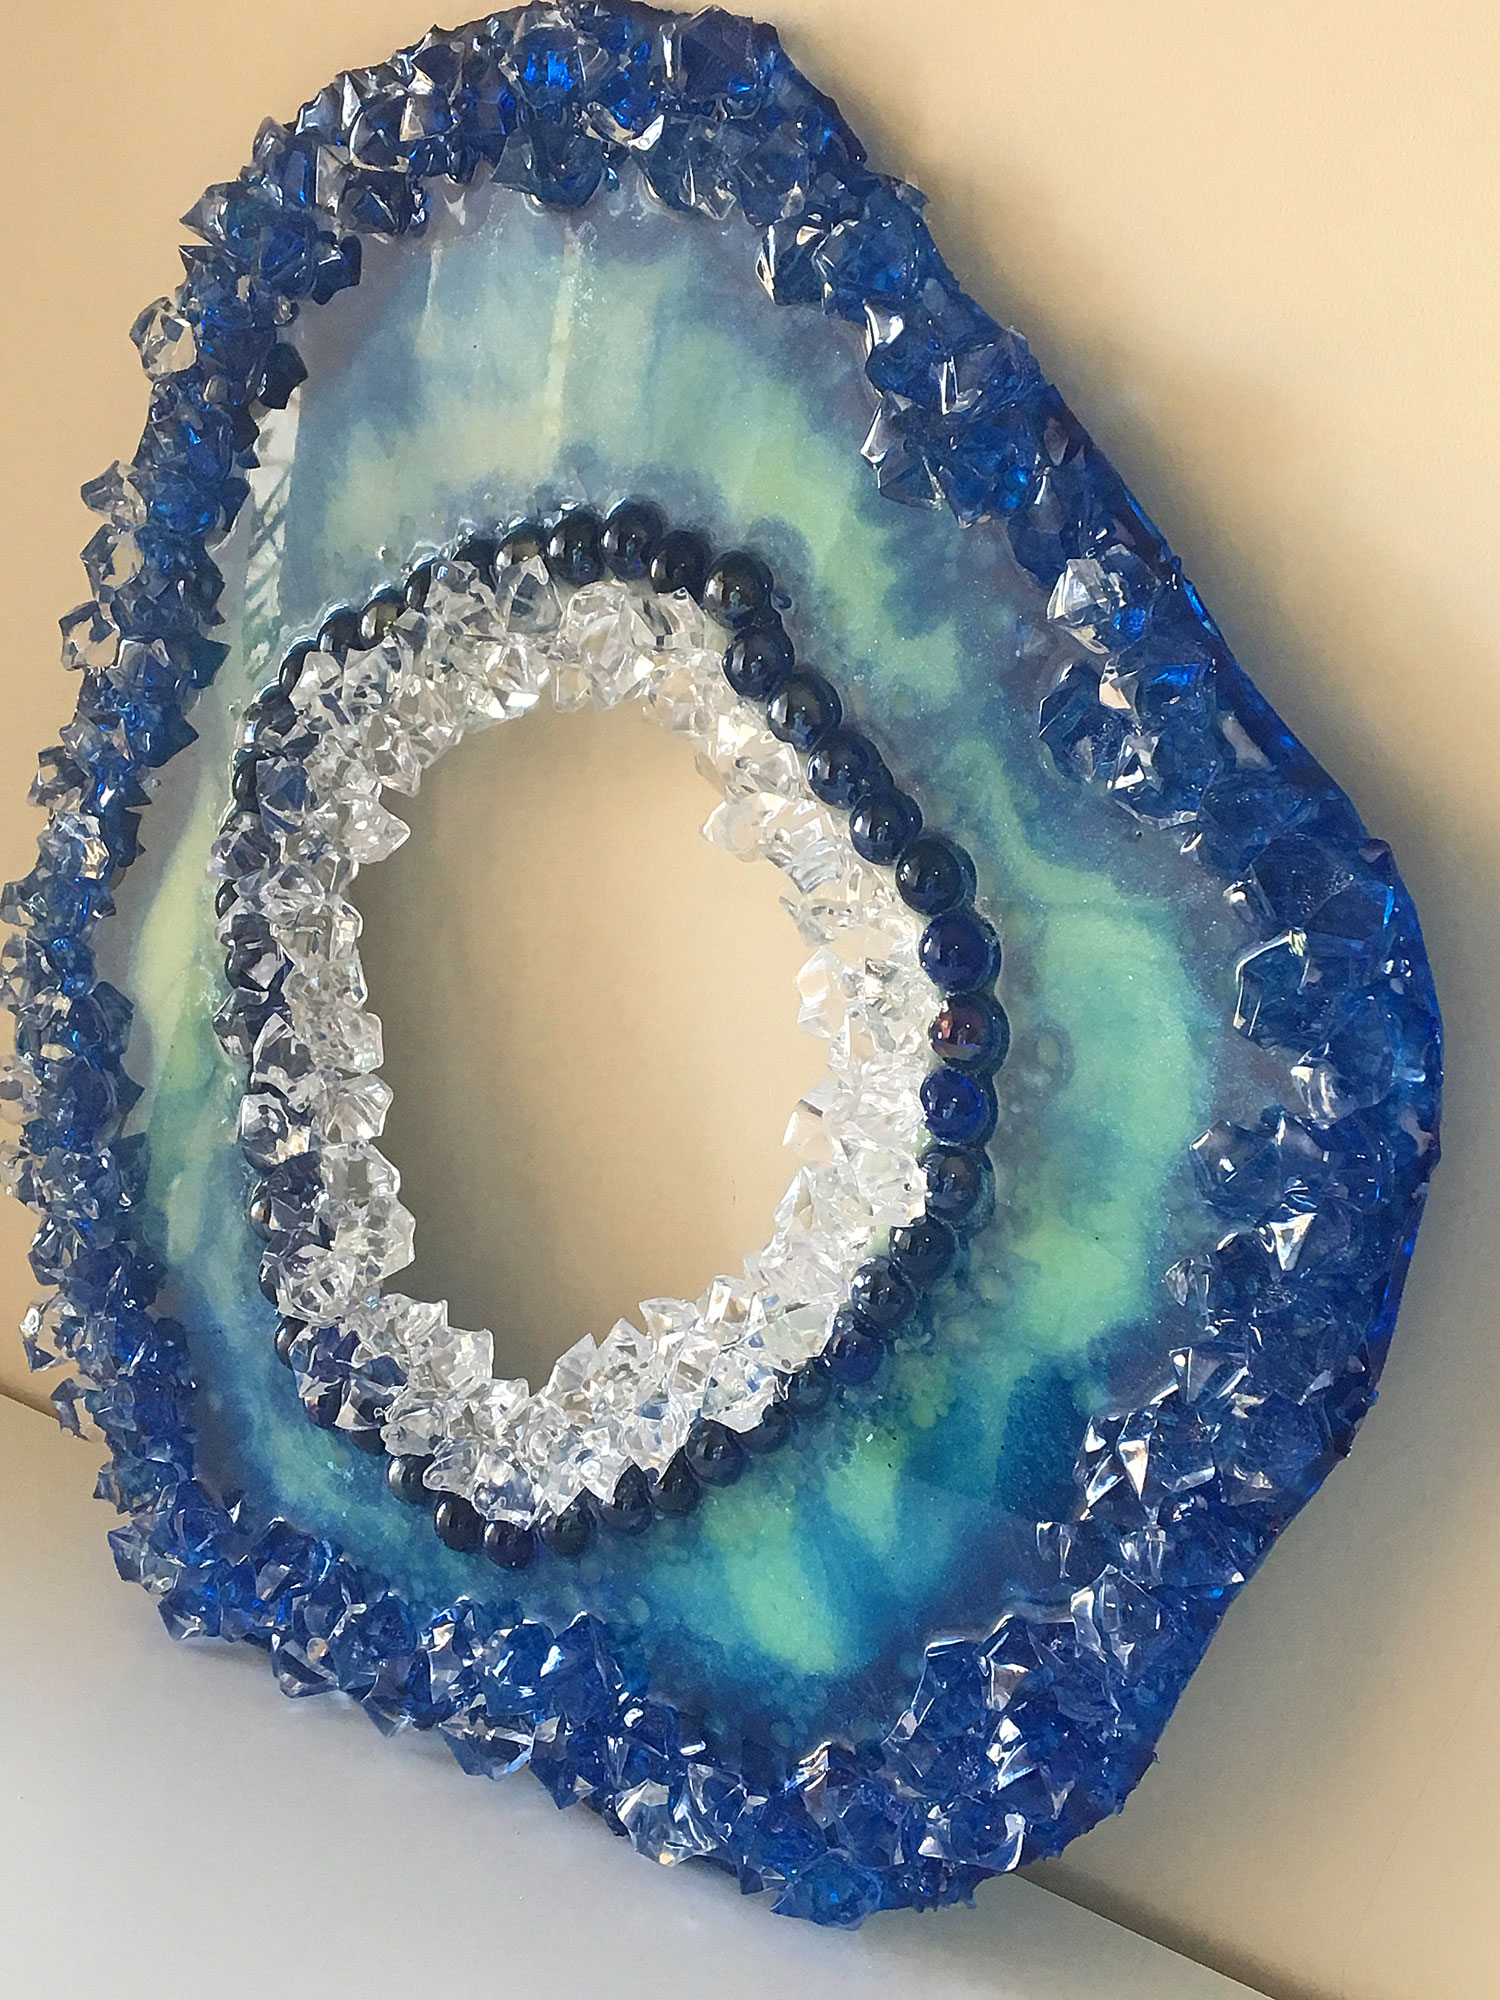
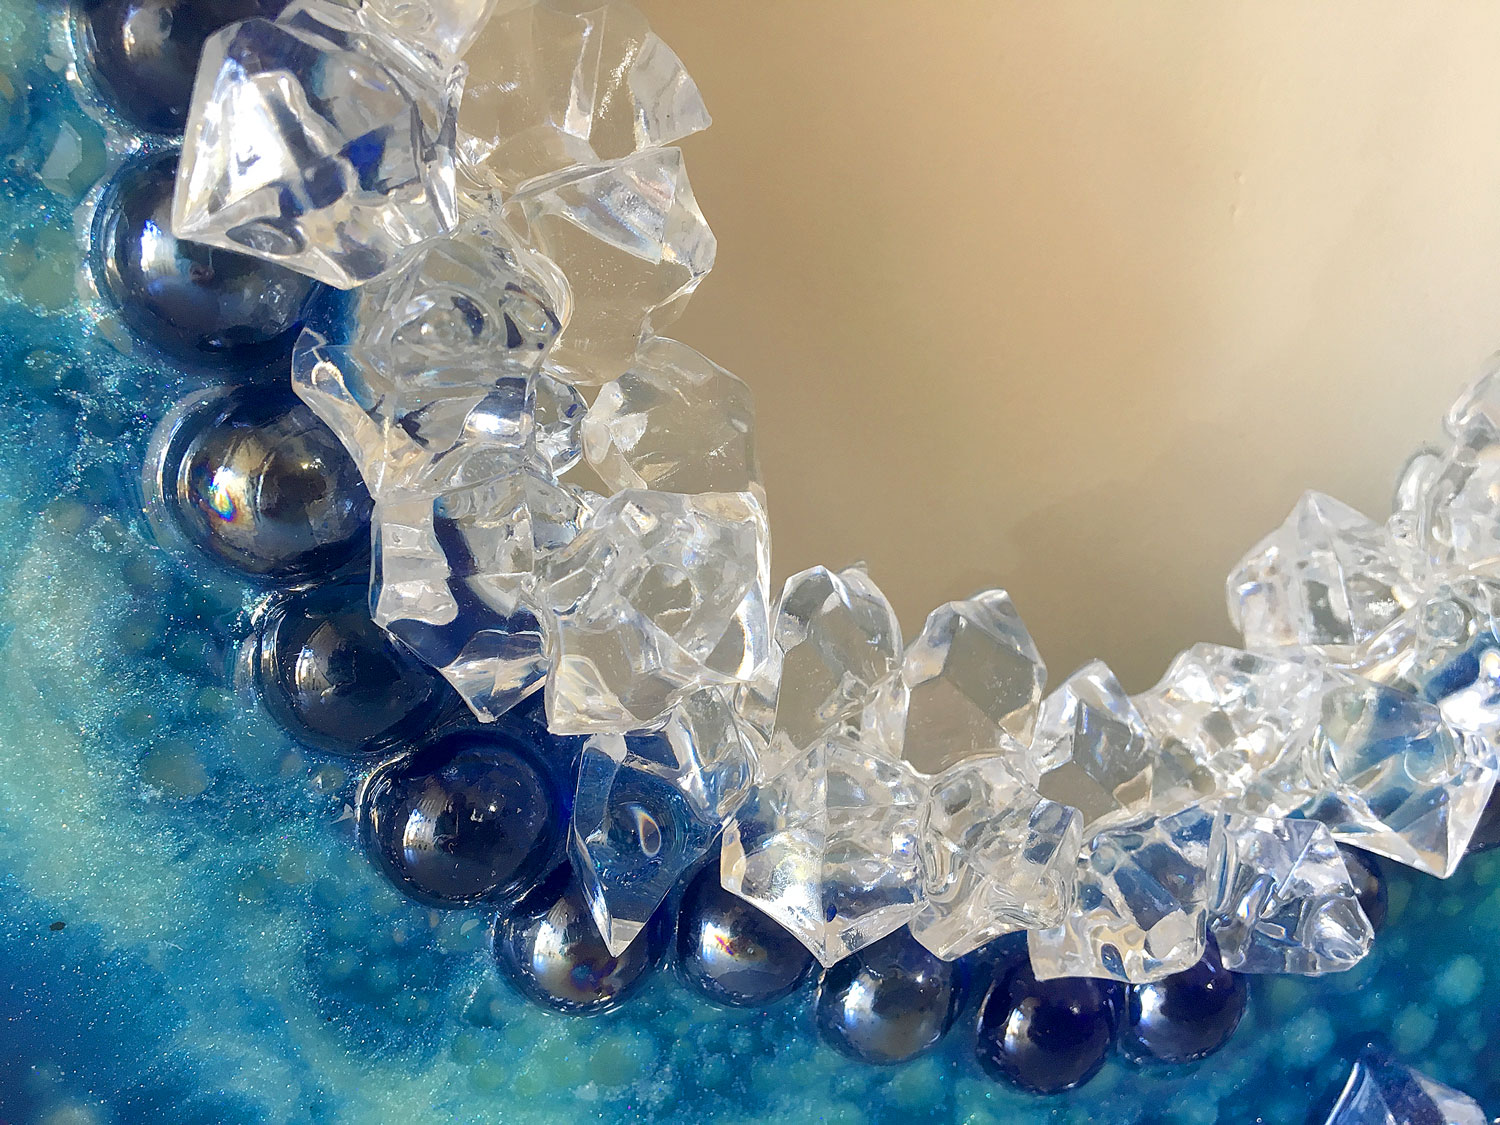
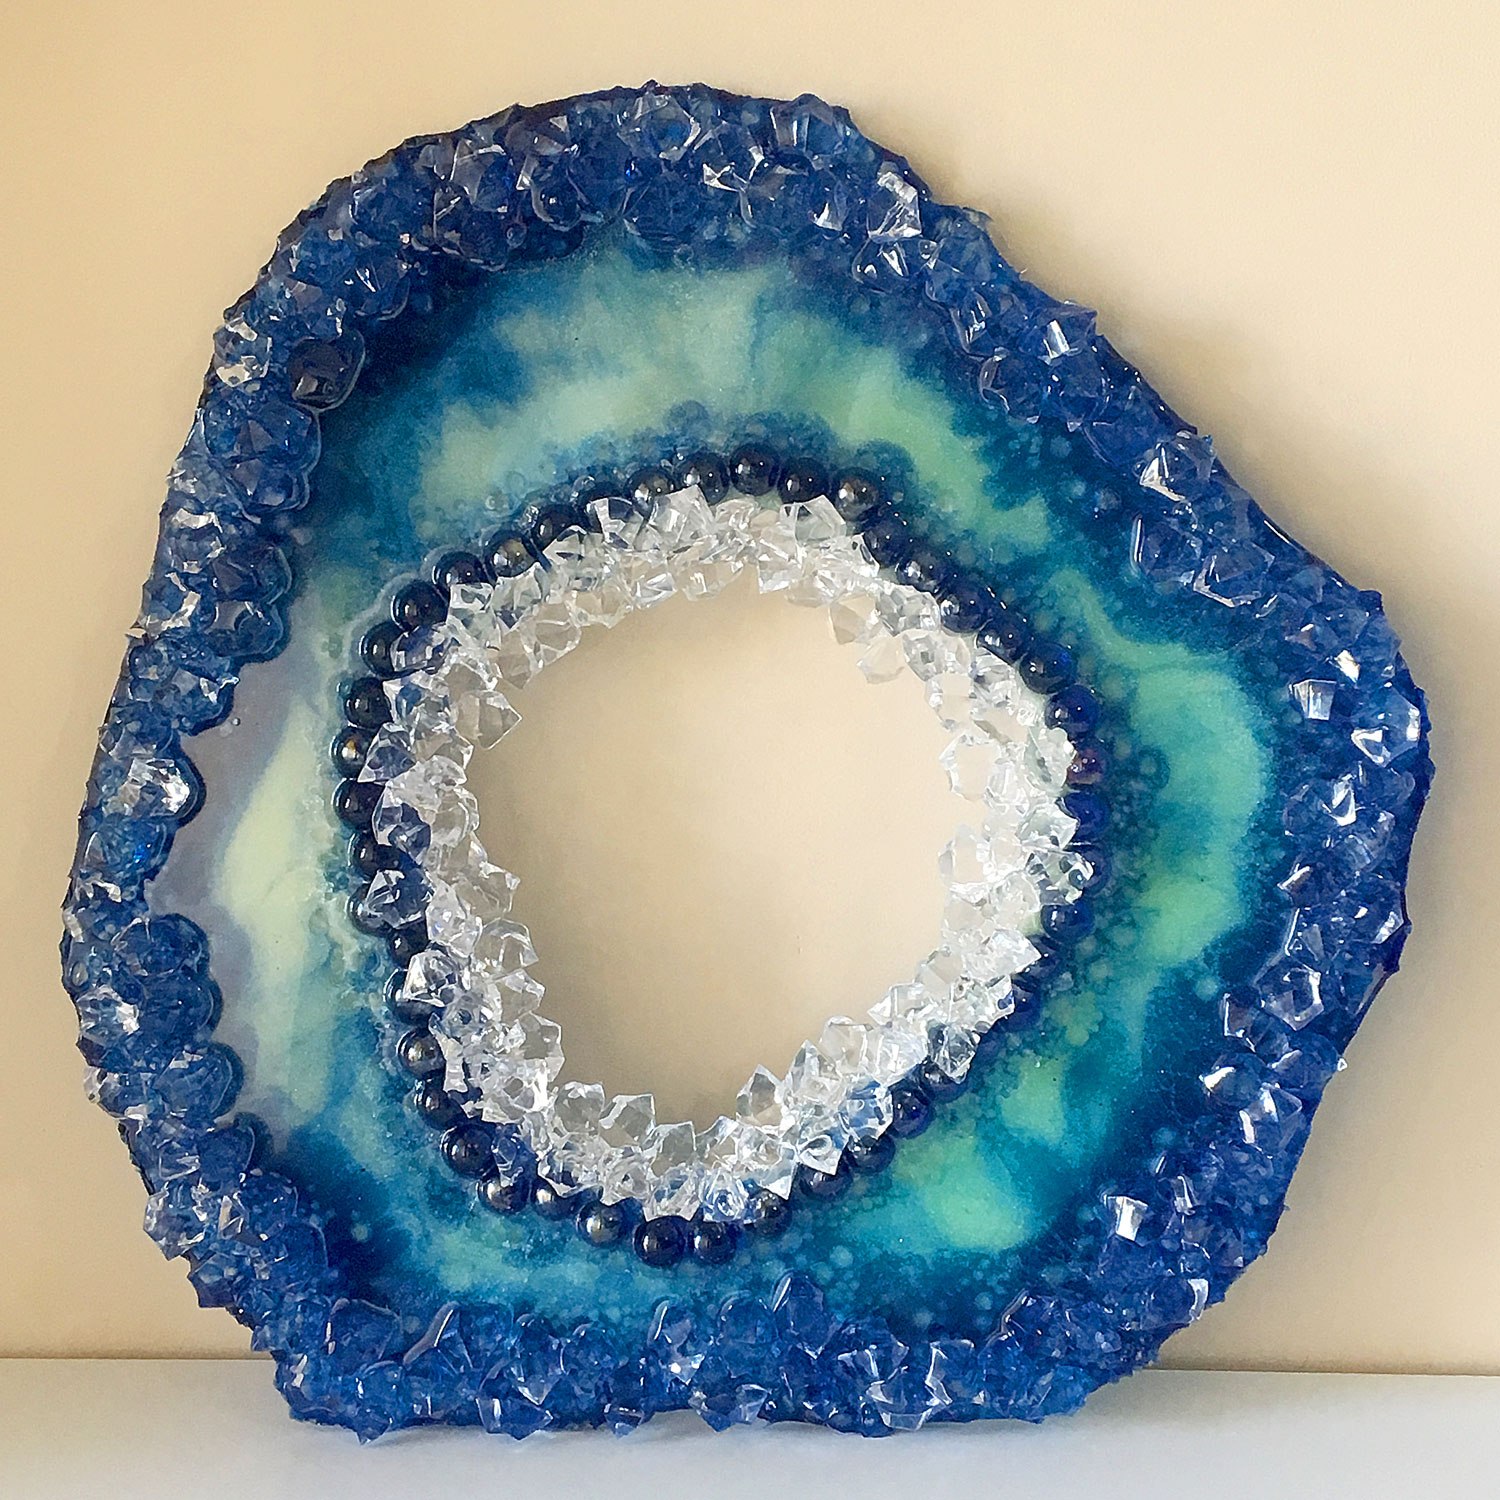
For this project, I used ropes and a plastic bag to create a freeform shape. Next, I poured the resin into the shape and then added the round glass pebbles around the centre and acrylic diamonds to the outer edge. I gently added resin to bring the level up to the top of the rope, so that it doesn’t overflow and has a thickness of around 8mm.
It was then left to cure overnight. The next day, I removed the rope and plastic and got to work on the next layer. First, I mixed a small amount of resin and added it to the acrylic shapes, making sure they were fully covered. Note, don’t use too much resin, because you don’t want to have a pool of resin in the centre of the geode.
These were then placed around the centre ring, making sure that each piece was touching the other pieces. When cured, you can flip it over and add some smaller pieces using the same method, to make sure they are fully secure. I also placed the acrylic shapes around the outer edge, to give the piece height and extra dimension.
Again, it was left to cure overnight. Unfortunately, I forgot to turn on the camera when working on the back. For this side, I simply added a very thin layer of resin and left it to cure for an hour before placing the D-Rings on the back. To make sure they were fully secure, I also screwed the D-Rings in place. It was then left to cure overnight before adding the hanging cord.
Now you have a freeform shape without the use of silicone or expensive moulds.
To replicate this project, you will need:
- Rope (approx 8mm thick)
• Resin – I used Liquid Glass Resin from U Resin: http://bit.ly/LiquidGlassResin - Acrylic Diamonds: http://bit.ly/acrylicdiamonds – Alternative Product: https://amzn.to/2Y7pVJi – US | https://amzn.to/2XWbdUt – UK
- Acrylic Shapes: https://amzn.to/2Xb4YPX – US | https://amzn.to/2XOwy71 – UK | https://amzn.to/2XIbHCh – AU
- Glass Marbles – Blue: https://amzn.to/2QdgsyF – US | https://amzn.to/2pdMcZv – UK
- India Ink: https://amzn.to/2TiyYDy – US | https://amzn.to/2Stcn8R – UK | https://amzn.to/2JIzY1c – AU
- Colour Arte – Rezin Art Lustre Pigments – Aquamarine: http://bit.ly/rezinarteaquamarine
- D-Rings for hanging: https://amzn.to/2WEqusw – US | https://amzn.to/2qR3Ja4 – UK
Books
If you are new to resin, then take a look at my beginner’s book, The Essential Beginner’s Guide to Resin Art Techniques.
eBook version: (http://bit.ly/resinguide)
Paperback version: https://amzn.to/2XEmqxn (US)* | https://amzn.to/2NMKAkY (UK)*
*Sales from this guide also go towards funding my YouTube resin tutorials.
Thank you for your support.
* Note – As an Amazon Associate, I earn from qualifying purchases. I realise that not everyone has access to the shops I have locally, so I have taken the time to find alternative products on Amazon and provide you with links. Please also note, I haven’t personally tried all of the product links, due to location, however, my aim is to help speed up your creative process by providing these links. Every time you click on a link and purchase a qualifying item, I receive a small commission, this payment helps to keep my tutorials free for you to watch.
If you would like to access my videos before everyone else, then please sign up to my newsletter: Sue Findlay Designs Newsletter
I would love to see your creations, please join my Facebook Group: Resin and Mixed Media Art Tutorials, and share what you have made.
I hope you enjoyed this video and it has given you ideas for creating your own freeform shapes using rope and plastic bags.
I think i enjoy these quick projects and directions even mote then youtube! Seldom do you you miss a point that makes me think i have to watch to do it right! Great jon Sue! I think you are my resin hero lol but seriously my resin vases have been complimented so many times! I always tell them you inspired me, follower her on pintrest because it is as easy as she makes it look! And like pancakes if the test one is no good just do it again! Glad we get you here in the states!
Hi Kimmy
Thank you for the lovely feedback, I am delighted that you find the tutorials easy to follow and that you have had great results from trying them out. Sue xx
What is the resin that you us. Iam sure it diffrance for diffrent project. I need the one that was a round wall piece that resembles a block with the four colors
I use U-Resin Liquid Glass Resin. I use this for both my wall art and sculptures. The only time I don’t use this is when I am pouring into a mould, then I use a casting resin. Sue x
I want to do a piece like this but to the frame around my mirror. How would I protect the mirror? Would the mirror need any special care prior to or during the project? Thank you
Hi Rosey
You can cover the mirror with plastic or painter’s tape. If you do get any resin on your mirror, it can be removed with a sharp blade.
Sue x
Thanks Sue for your free art tutorial and all the details you share, I really admire resin art and wood art, hoping to get the time to enjoy working with all the materials and do my own art. Thanks again for your encouragement.
My pleasure, Najwa
Thank you for stopping by and watching my tutorials.
Kind regards
Sue