This is a quick and easy tutorial on how to mould a resin trinket dish. For this project, I first began by pouring the coloured resin on to baking paper, which had been placed on an upside-down serving tray. If you don’t have a serving tray, a plate will do. I then added acrylic diamonds to the outer edge of the resin, to give it some added interest and texture. It was then left to cure for a couple of hours, your resin is cured enough when you can touch it and it is still very bendy. Resin curing times will vary from brand to brand, so check on yours every half hour.
Tip – Pour a small amount on a separate sheet of baking paper, you can test this piece without touching your curing piece.
Next, the resin was transferred to the oval plastic dish (a round dish will also do), I left the baking paper on at this stage because it wasn’t ready for removal. I removed the baking paper after the resin had been curing for about 4 hours (again, this time will vary depending on your brand of resin). It was then placed back into the plastic dish and left to cure overnight. You can use a little bit of heat to warm the resin in order to bend it into the dish.
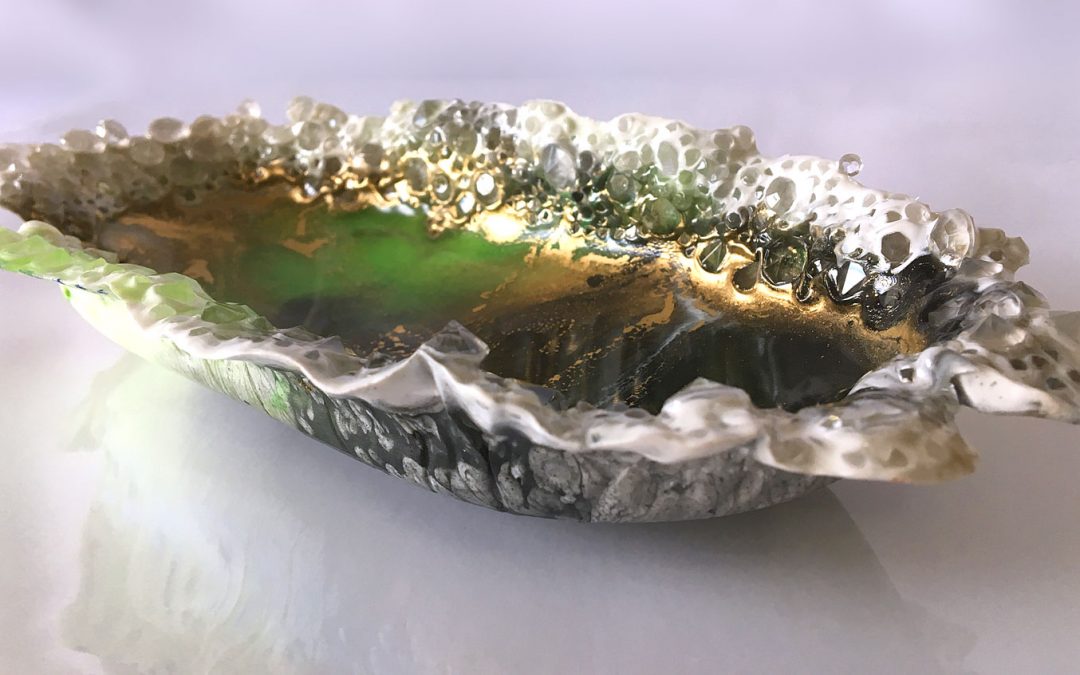
Once cured, you have a fabulous resin trinket dish.
Materials used in this project
• Plastic tray (used upside down)
• Baking Paper
• U-Resin
•
•
• Le Rez Paste – Angel White
• Le Rez Pigment – Molten Gold
• Acrylic Diamonds/Table Scatters https://amzn.to/2Y7pVJi*
• Oval shaped dishes for moulding (any plastic dish will do)
* Note – As an Amazon Associate, I earn from qualifying purchases. I realise that not everyone has access to the shops I have locally, so I have taken the time to find alternative products on Amazon and provide you with links. Please also note, I haven’t personally tried all of the product links, due to location, however, my aim is to help speed up your creative process by providing these links. Every time you click on a link and purchase a qualifying item, I receive a small commission, this payment helps to keep my tutorials free for you to watch.
If you would like to access my videos before everyone else, then please sign up to my newsletter: Sue Findlay Designs Newsletter
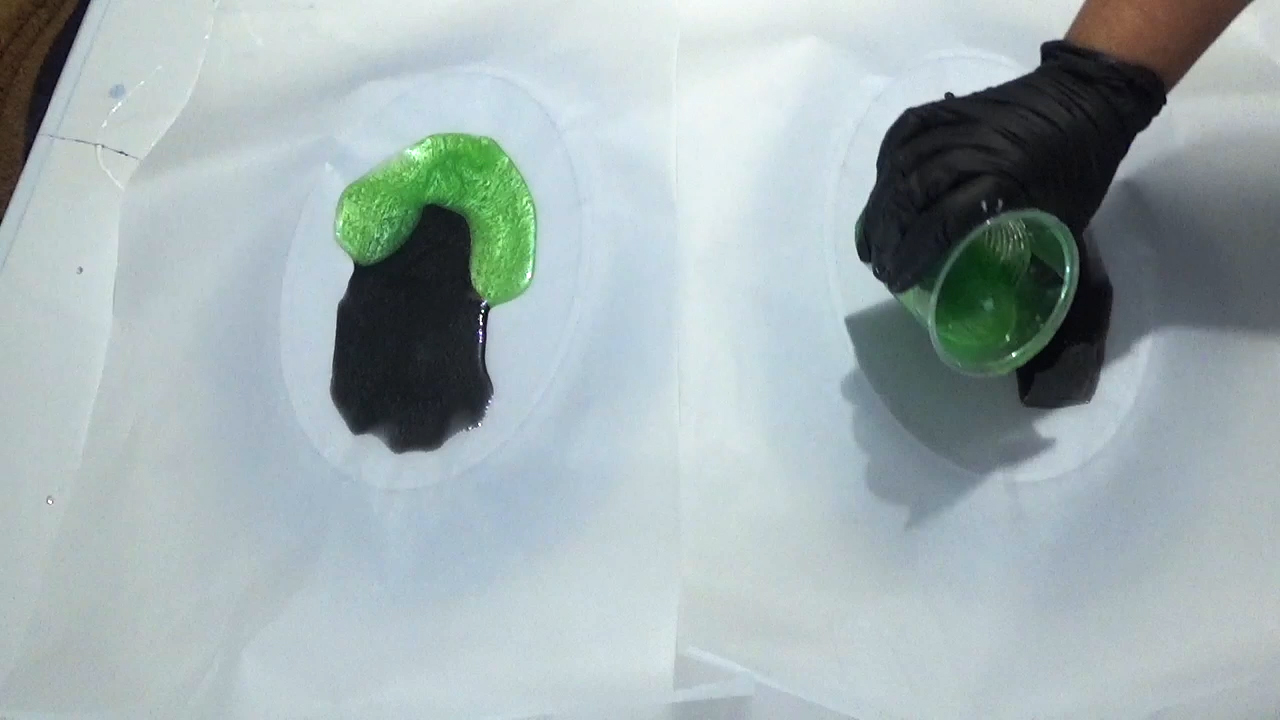
First, we cover an upside down serving tray with baking paper. Then pour the coloured resin onto the paper.

Next we move the resin using a stick. Be careful not to over do the mixing to retain the nice mix of colours.
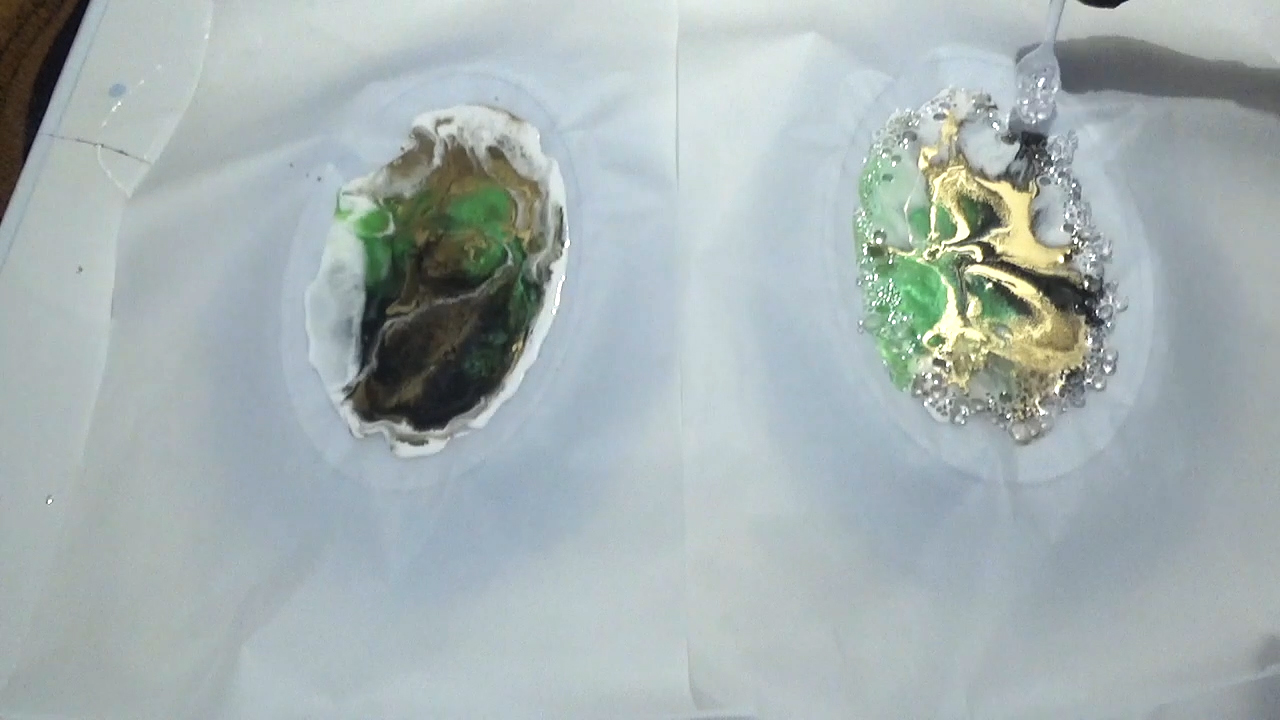
Then add acrylic diamonds or crushed glass to the outer edges of the resin. Don’t add any to the centre, as it will make your dish unsteady.

Leave to cure until you can touch the resin, however, it is still bendy. Times will vary depending on your resin. Then move it to a plastic dish and using a little heat, mould it into the dish.
Leave it to cure over night before prising it out of the plastic dish. You may need to help it out with a knife.
I hope this video has sparked your creativity and has inspired you to create your own Resin Trinket Dish.
I would love to see your creations, please join my Facebook Group: Resin and Mixed Media Art Tutorials, and share what you have made.
so awesome, awesome technique and colours. So inspiring. Thank you
Thank you, I am delighted that you enjoyed the video. Sue