Materials used for this project are:
Viking Multi Purpose Filler (any brand of filler will do)
Silver Acrylic Paint
Spatula
U Resin Standard UV
Langridge Artist Colours – Phthalo Green, mixed with
Colour Obsession Powder – Teal – for a green metallic look
Colour Obsession Paste – Black Truffle
A1 Pigments – Crystal Series – Flashing White
A1 Pigments – Crystal Series – Pure White
Heat Gun for zapping bubbles

For this project I am using a cradled board. First make sure the surface is clean and dry before we begin.

For this project we are using a ready mixed multipurpose filler (any brand will do) and applying it directly to the board using a spatula. Although, you could use a knife or any other tool you have to hand.

Once the filler has been applied and you have created your desired shape. For this one I am creating a river through the middle, so the shape doesn’t need to be perfect. Using the edge of your spatula or knife, drag it through to rough up the texture, we don’t want smooth edges.

Leave your texture paste to dry overnight. I also painted the board silver the day before and left it to dry overnight. Next we apply a thin layer of black resin to the board.
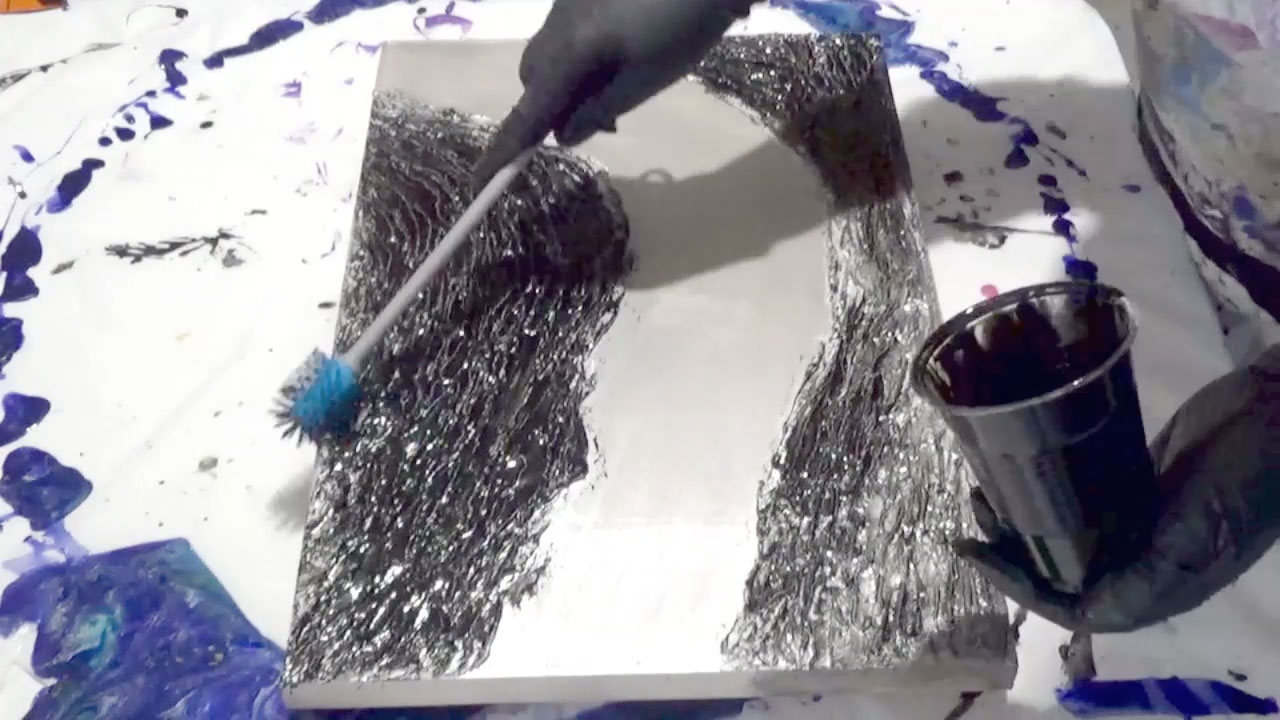
You can spread the resin using your fingers, but as the texture was quite rough, I ended up using a silicone bottle brush. This works well to get into the groves of the texture.

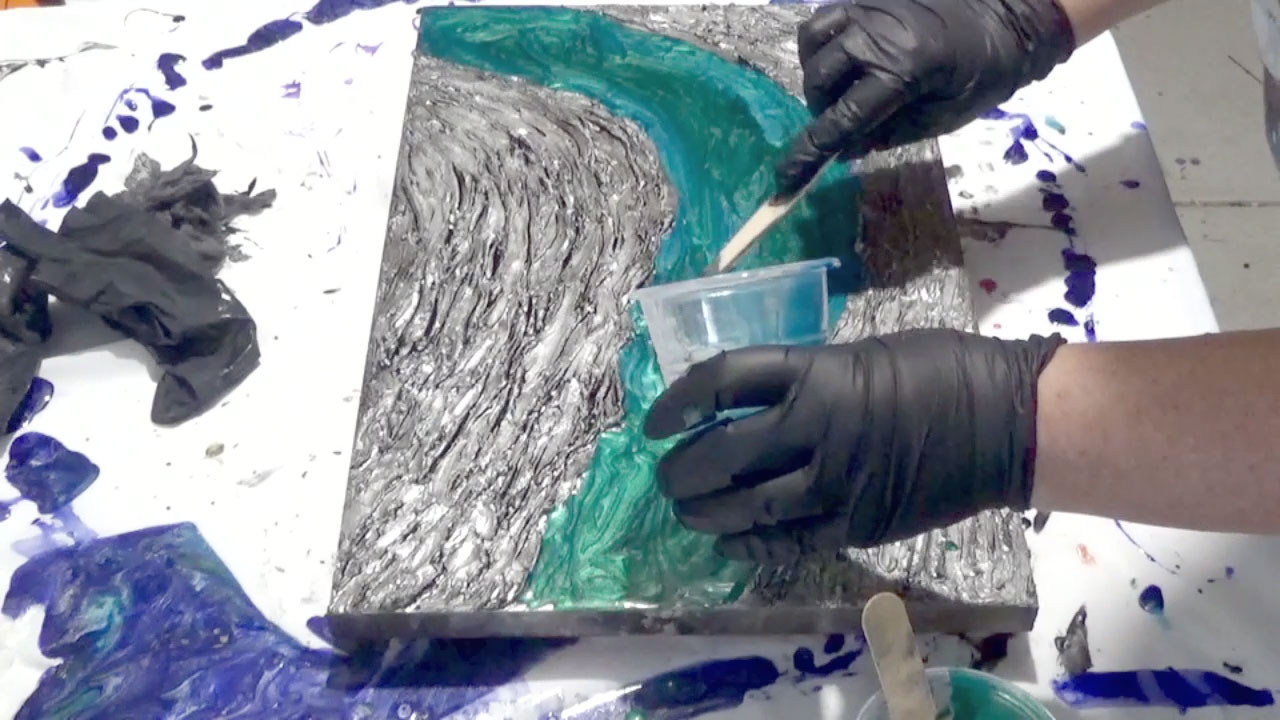
Now using a baby wipe, we are going to lift most of the resin to expose the silver underneath. Also using the baby wipe, I spread the resin all over the river area, to dull it down a bit and help it blend in with the rest of the texture.

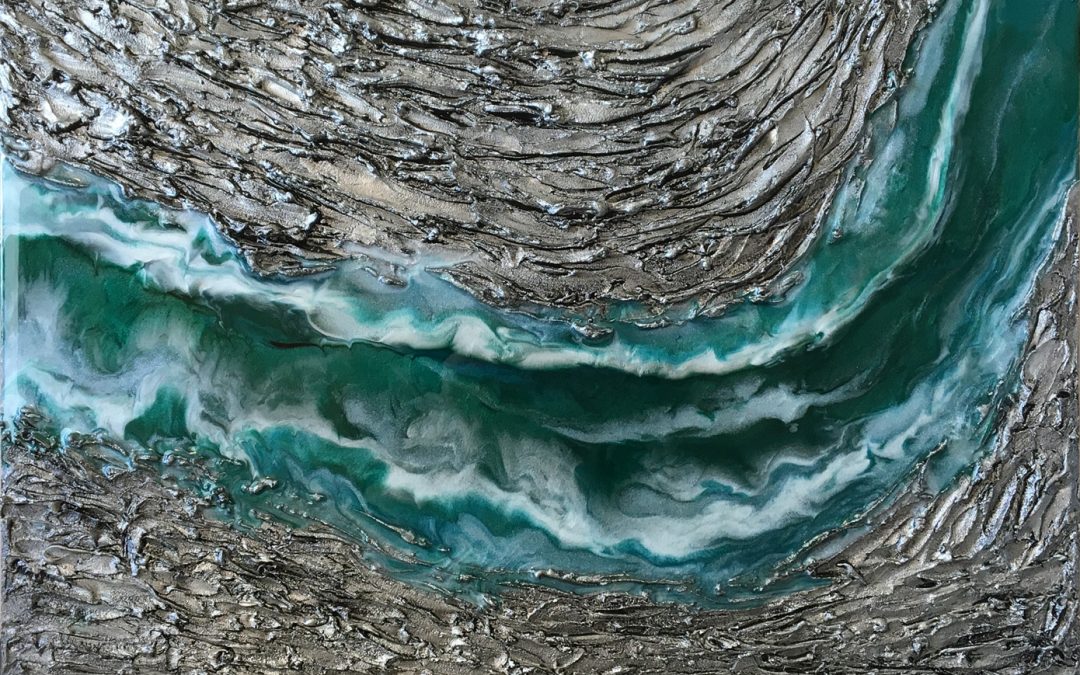
Now it is time to apply the green resin layer. Apply it down the middle, we will use a stick to help move it to the out edges once more colours have been added.
The blue resin has also been added along the river bed and using a stick I am helping it blend. Make sure you move the stick along the flow of the water for a more realistic effect.
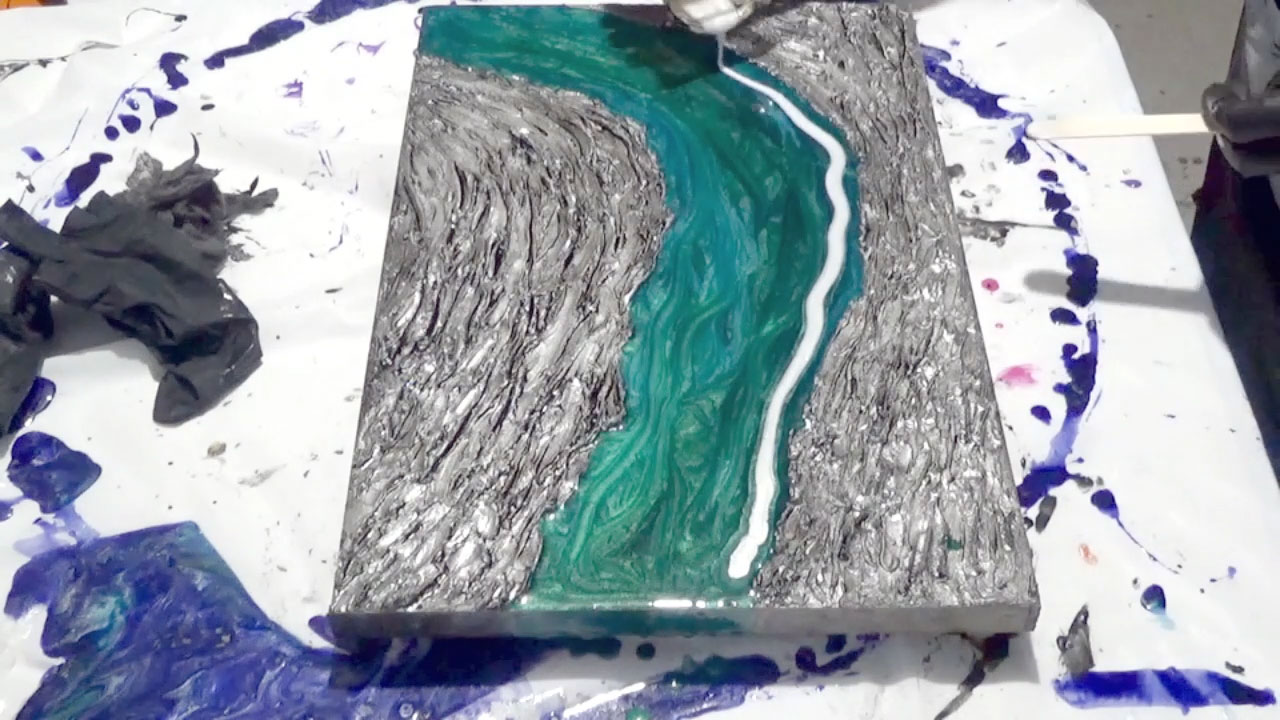
Now to add thin strips of white. Don’t go over the top with this, just add a small amount. Add it to the shore line on both sides of the river. Less is more!

Using a heat gun or a hairdryer (on a low blow setting), move the white resin slightly. Don’t go mad, you still want to see the green and blue beneath it.

Now for my favourite part, watch the resin move when you add mineral turpentine with a stick. You get a very good reaction with the turps is applied.
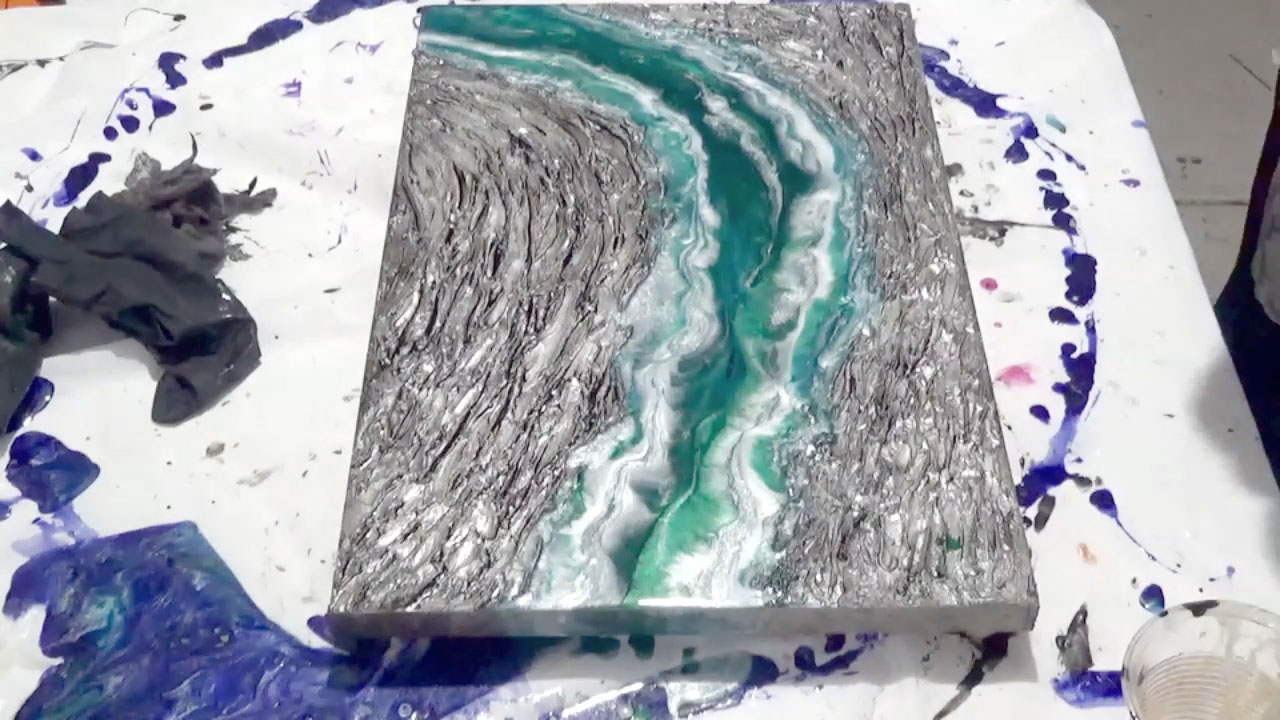
As you can see, you get a very realistic looking waters edge when you add mineral turpentine.
I hope you enjoyed this tutorial and it has inspired you to create your own version.