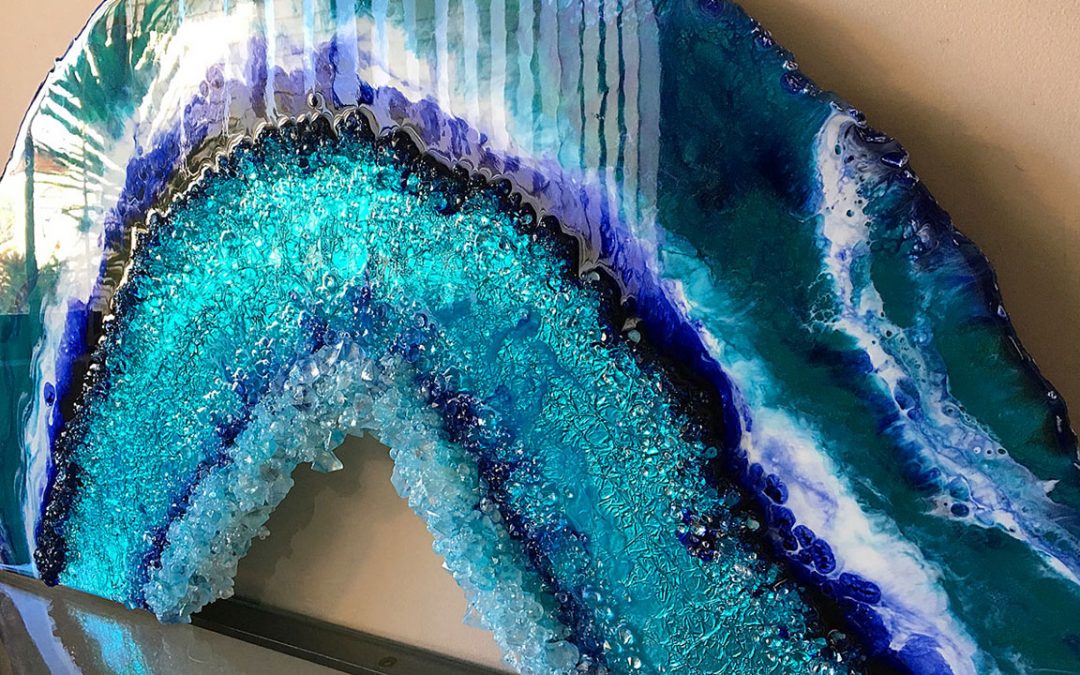
For this project, I was asked to create a freeform textured geode, so following on from my previous video, I decided to include foil in the centre.
To create the shape, I drew out a rough sketch of how I wanted it to look, being mindful that the recipient wanted it to be 90 cm wide. Using a jigsaw, I cut out the shape. For the textured edge, I used multi-purpose filler, although, you can use a wood filler or texture paste. For a nice smooth surface, make sure you scrape any excess from the surface of the board. Otherwise, you could end up with lumps and bumps on the outer edge.
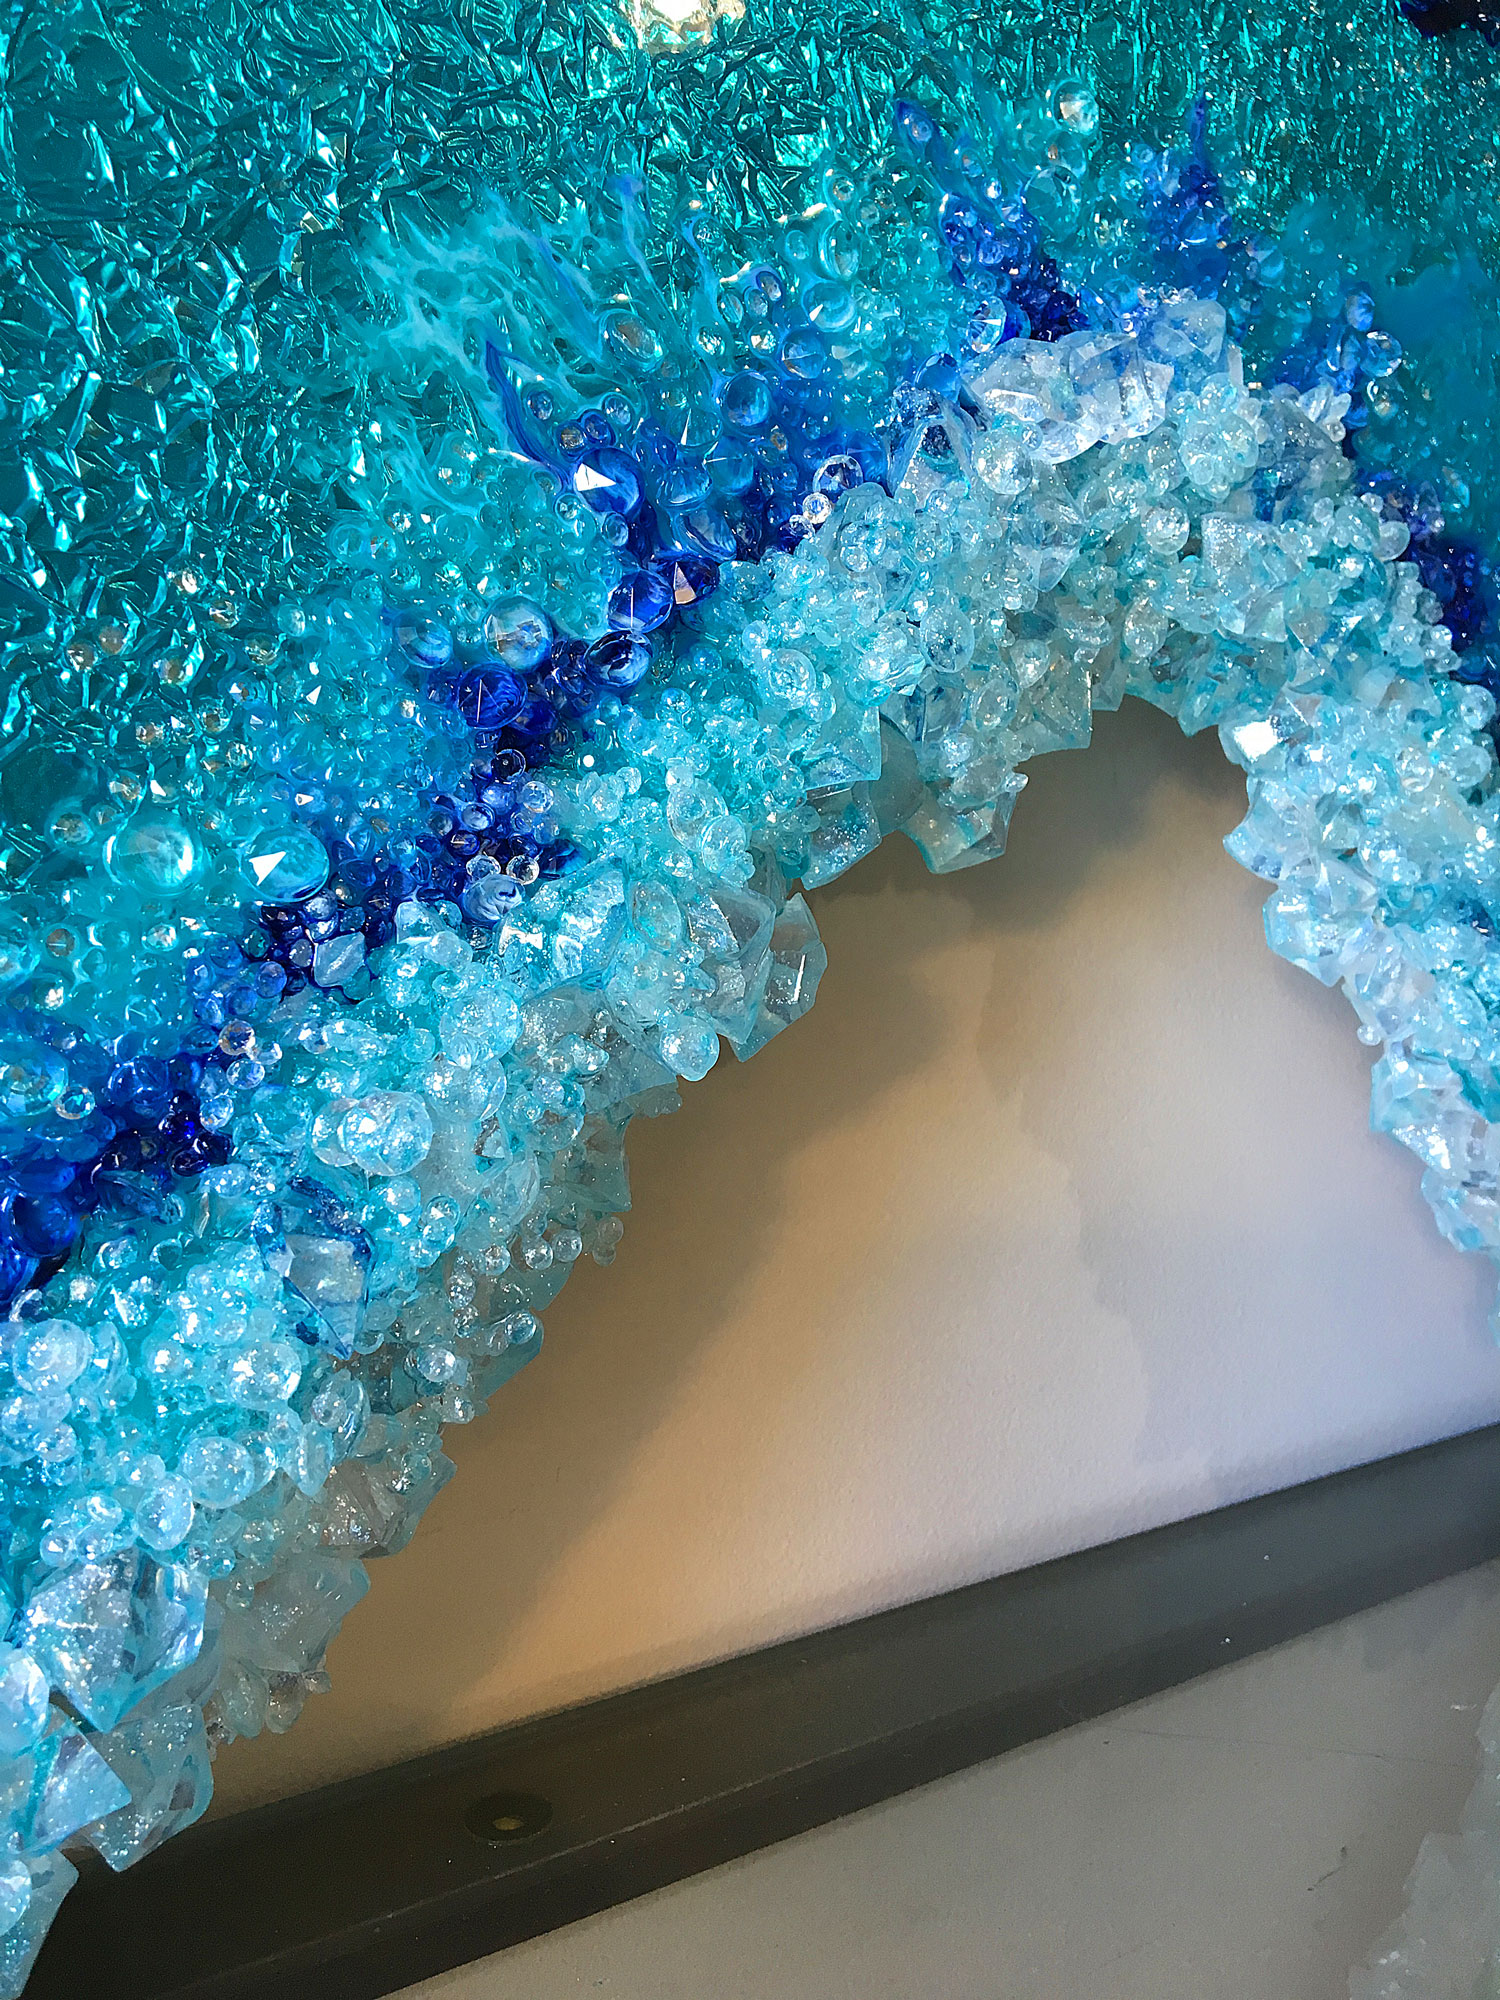
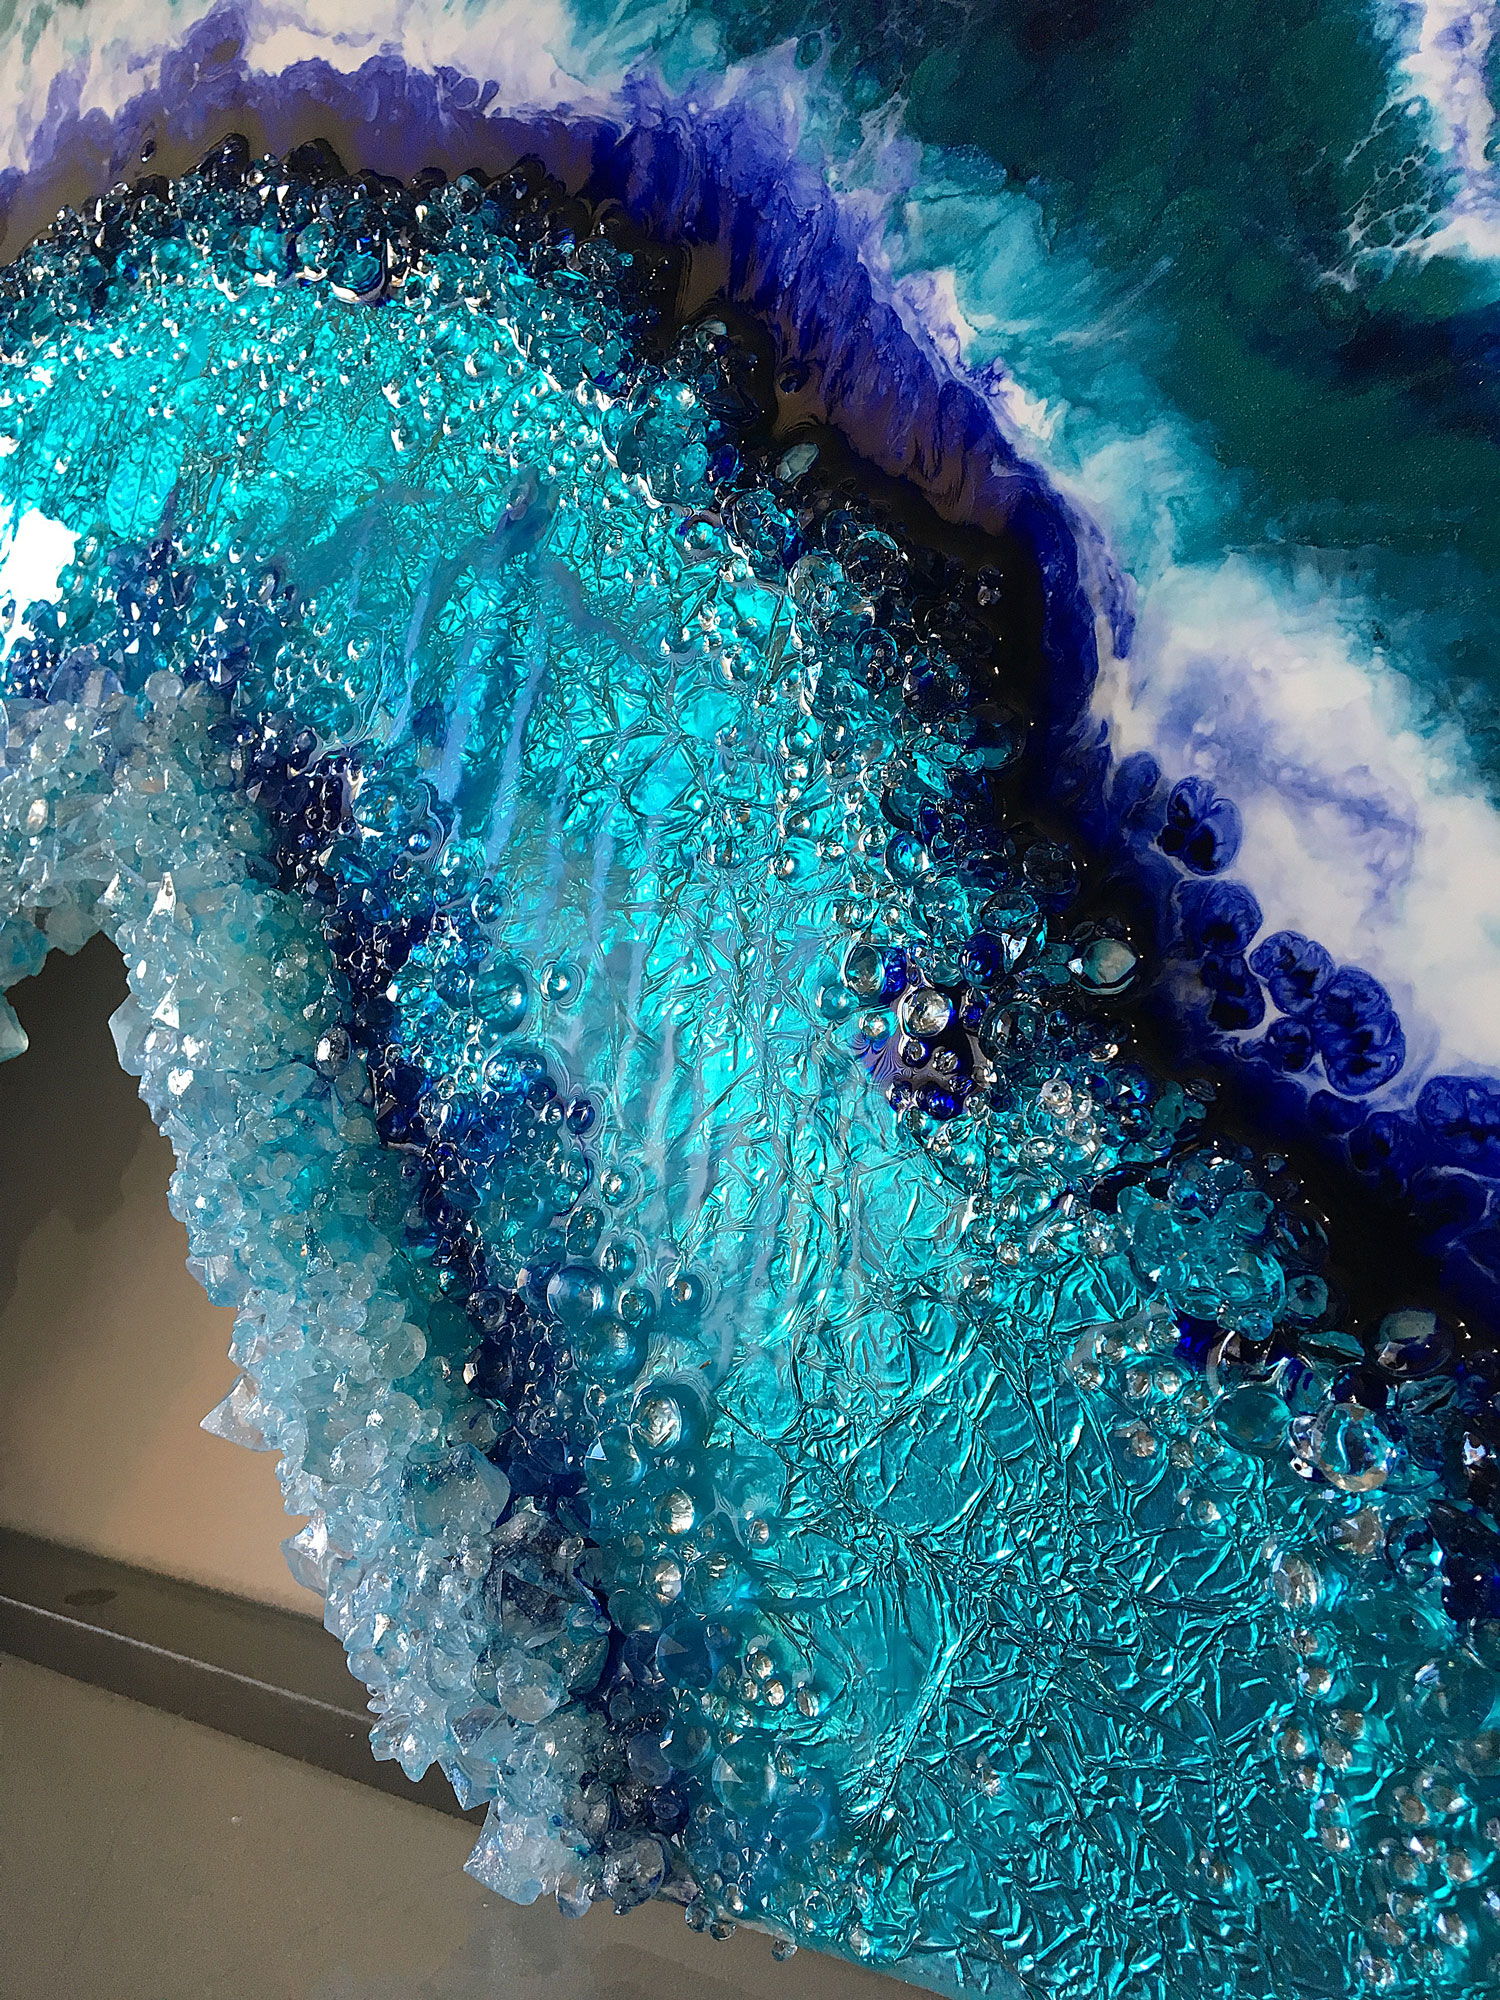
Next, apply the foil to the board using PVA glue (wood glue) or any similar glue and leave to dry overnight. Once dry, you can trim any excess foil off. For the faux stones around the inner edge, I used acrylic diamonds and shapes and glued them in place using a small amount of resin. Again, this was left to cure overnight before moving on to the priming the board.
Now that the crystal edge is done, it is time to resin the rest of the board. For the raised edge around the edge of the foil, I again, used acrylic diamonds, only this time the resin was tinted with a touch of India Ink, the same colour was used for colouring the foil. You need to make sure your resin is transparent so that you can see the foil through it, this is where India Ink comes in handy. You only need a tiny amount to colour the resin.
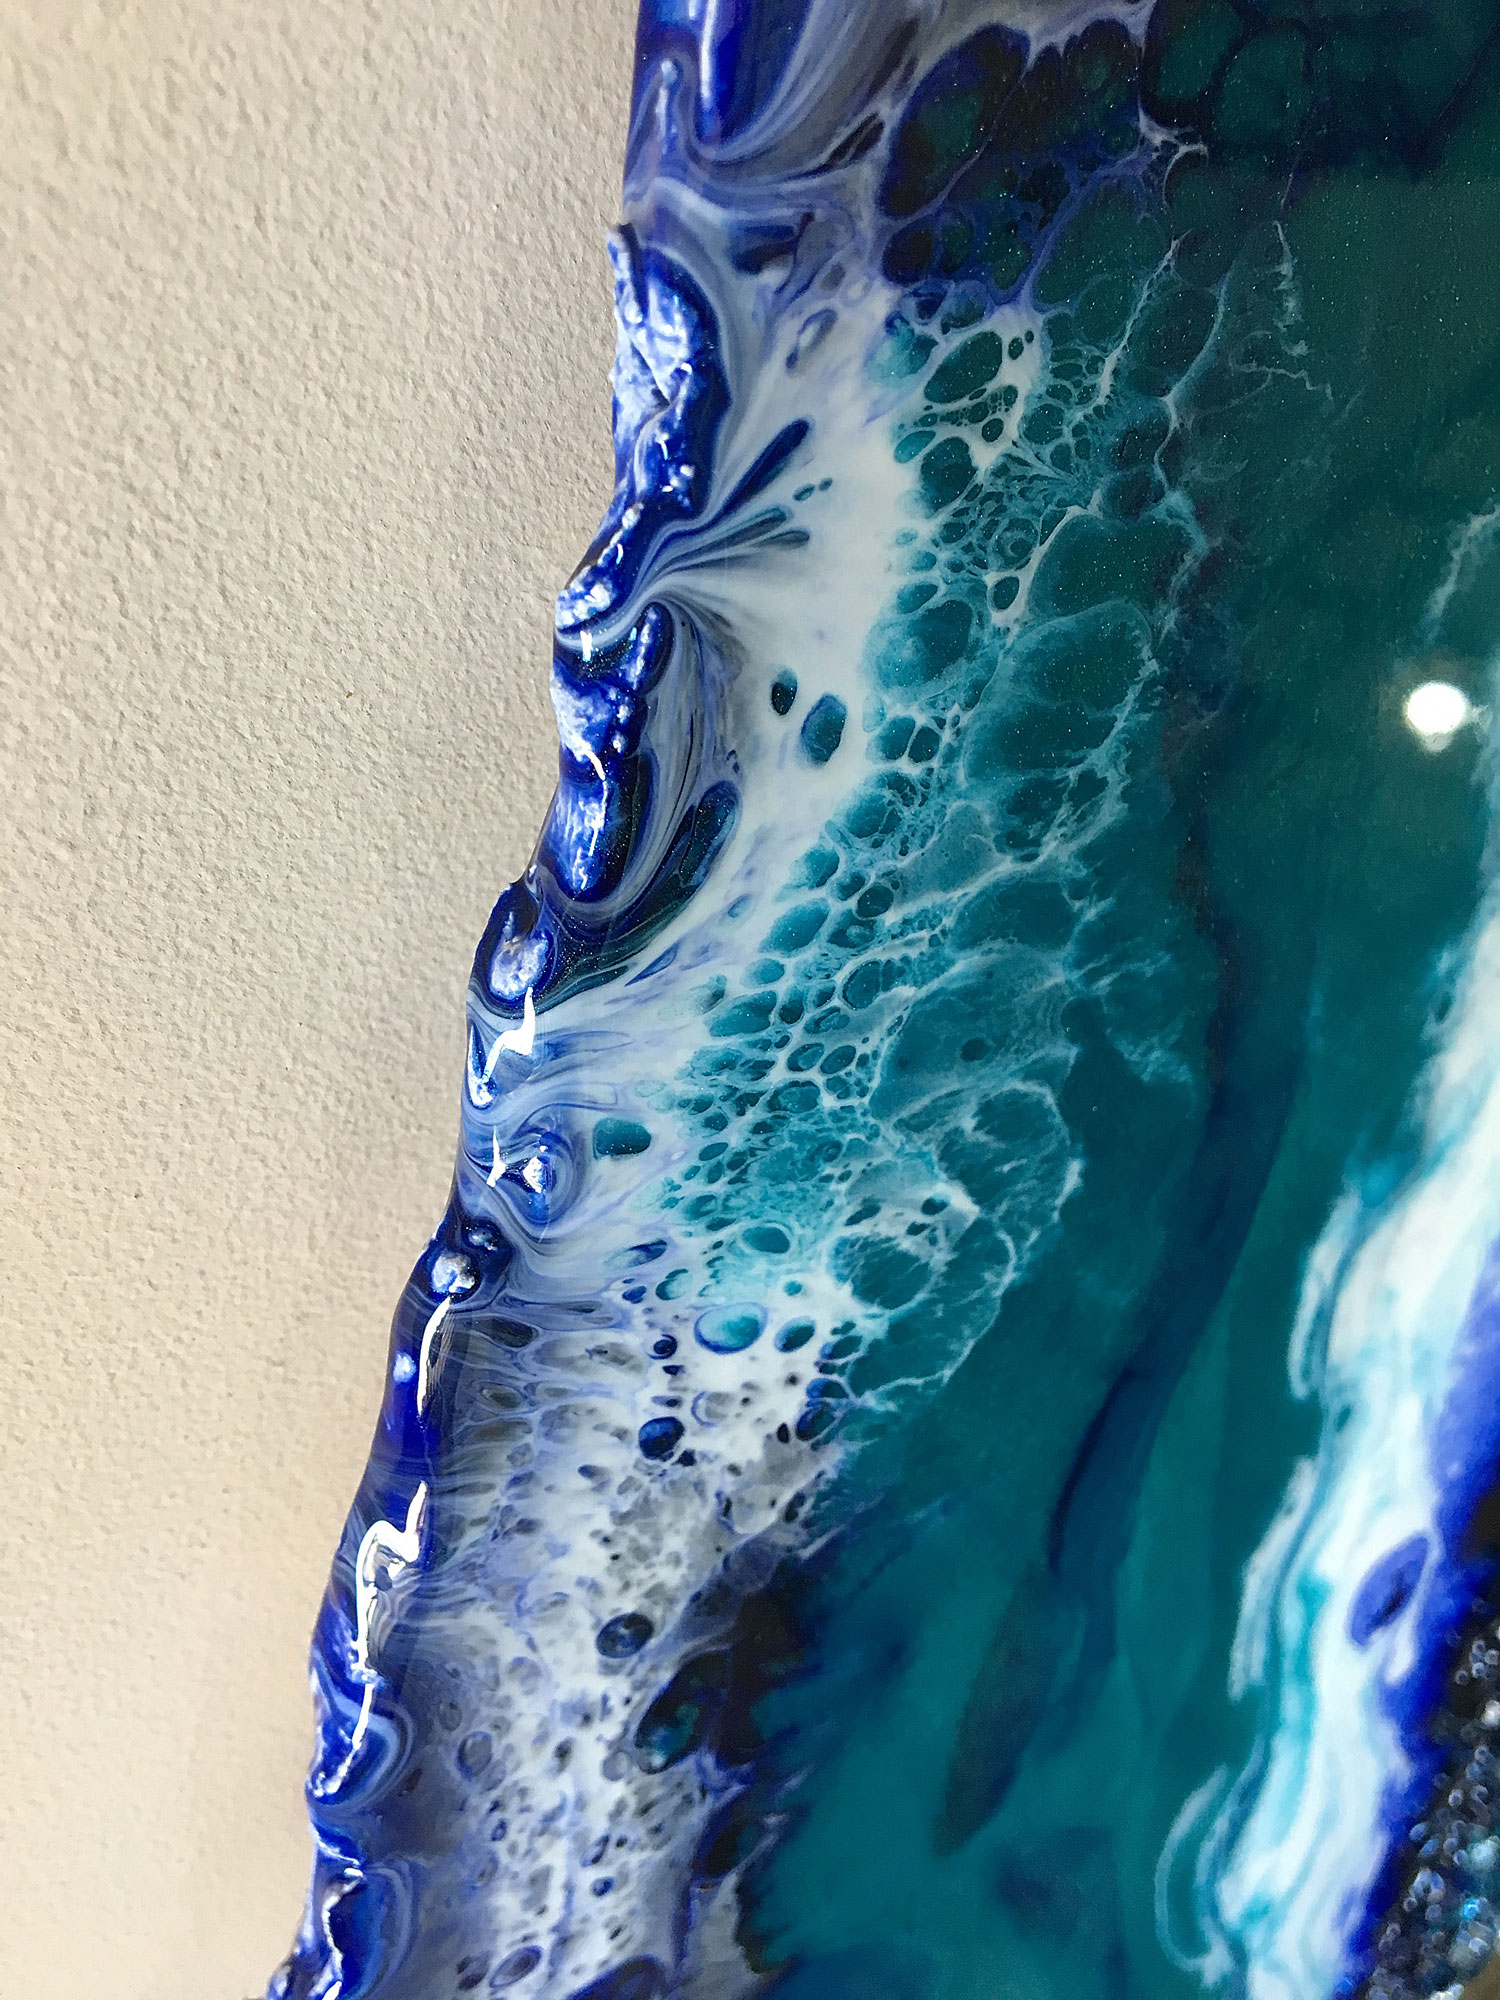
For the outer edge, the resin was poured in lines around the foil and then using mineral turpentine and a bit of heat, the effects were created.
To finish this piece off, I will add a three-sided frame to the back, to not only give it strength but to make it look like the board is floating on the wall.
Materials used for this project:
- MDF panel cut to shape using a Jigsaw
- PVA Glue or Elmar’s Glue https://amzn.to/2k01bUf – US | https://amzn.to/2JIyaFy – UK*
- Aluminium Foil
- Acrylic Diamonds http://bit.ly/acrylicdiamonds* – Alternative Product: https://amzn.to/2Y7pVJi – US | https://amzn.to/2XWbdUt – UK*
- Acrylic Shapes https://amzn.to/2Xb4YPX – US | https://amzn.to/2XOwy71 – UK | https://amzn.to/2XIbHCh – AU*
- India Ink https://amzn.to/2TiyYDy – US | https://amzn.to/2Stcn8R – UK | https://amzn.to/2JIzY1c – AU*
- Ready Mixed Multipurpose Filler – Alternative Product: https://amzn.to/2FBLAlW – US | https://amzn.to/2XI8SkC – UK*
- Cellophane Wrap https://amzn.to/2Oj8Uri – US | https://amzn.to/2NYjEPi – UK | https://amzn.to/2XJhfMN – AU*
- Colour Obsession Pigment Paste – Stormy Seas
- Colour Obsession Pigment Powder – Teal
- Le Rez Expressions Epoxy Pigment Paste – Angel White http://bit.ly/lerezmatpaste
Books
The Essential Beginner’s Guide to Resin Art Techniques
eBook version: http://bit.ly/resinguide
Paperback version: https://amzn.to/2XEmqxn (US)* | https://amzn.to/2NMKAkY (UK)*
*Sales from this guide also go towards funding my YouTube resin tutorials.
Thank you for your support.
* Note – As an Amazon Associate, I earn from qualifying purchases. I realise that not everyone has access to the shops I have locally, so I have taken the time to find alternative products on Amazon and provide you with links. Please also note, I haven’t personally tried all of the product links, due to location, however, my aim is to help speed up your creative process by providing these links. Every time you click on a link and purchase a qualifying item, I receive a small commission, this payment helps to keep my tutorials free for you to watch.
If you would like to access my videos before everyone else, then please sign up to my newsletter: http://bit.ly/suefindlay
As always, I hope you enjoy this video.
Please let me know what you think about the camera attached to my respirator.
I would love to see your creations, please join my Facebook Group: Resin and Mixed Media Art Tutorials, and share what you have made.
Such a great idea using the foil. I’m goi g to try to make a geode today.
Thank you, good luck with your project using foil.
Beautiful! Do you do a final clear layer over the piece?
Hi Nicole
No, I don’t, I like to see the texture in the piece.
Kind regards, Sue
What kind of wood do you use?
I use MDF board.
Bon jour pourriez vous me traduire les explications en francais car cela est magnifiqud
Désolé, je n’ai pas le temps d’aller tout traduire dans différentes langues. Remarque, j’ai utilisé Google pour traduire ce message, je vous suggère de faire la même chose pour votre langue. Sue
Beautiful ❤️
Thank you xx
Gorgeous.
Thank you xx
That’s just plain lovely! Thanks for the detailed instructions, although I doubt I’ll make one. Lucky folks who commissioned it from you, though 🙂 🙂
Thank you and you’re very welcome.
The camera on the mask was not bad at all i like the fact of it. Considering it helps since I am losing my eyesight and I am trying to get as much detail from the work as possible. Thank you for what you do.
Thank you for your feedback, it is very much appreciated.
Sue x
Great video Sue.
Great clarity and explanation.
Many Thanks
Thank you, Robyn
I am delighted you found it to be helpful.
Sue x