In this video I am once again exploring texture in resin. For this one I am using multipurpose filler, however, you can use wall filler or wood filler. I have opted for the ready mixed filler, due to its ease of use and of course, it saves a lot of time.
The filler is left overnight to dry, the board is then primed to protect it from moisture and prevent it warping. Once again, it is left overnight to dry before pouring the resin.
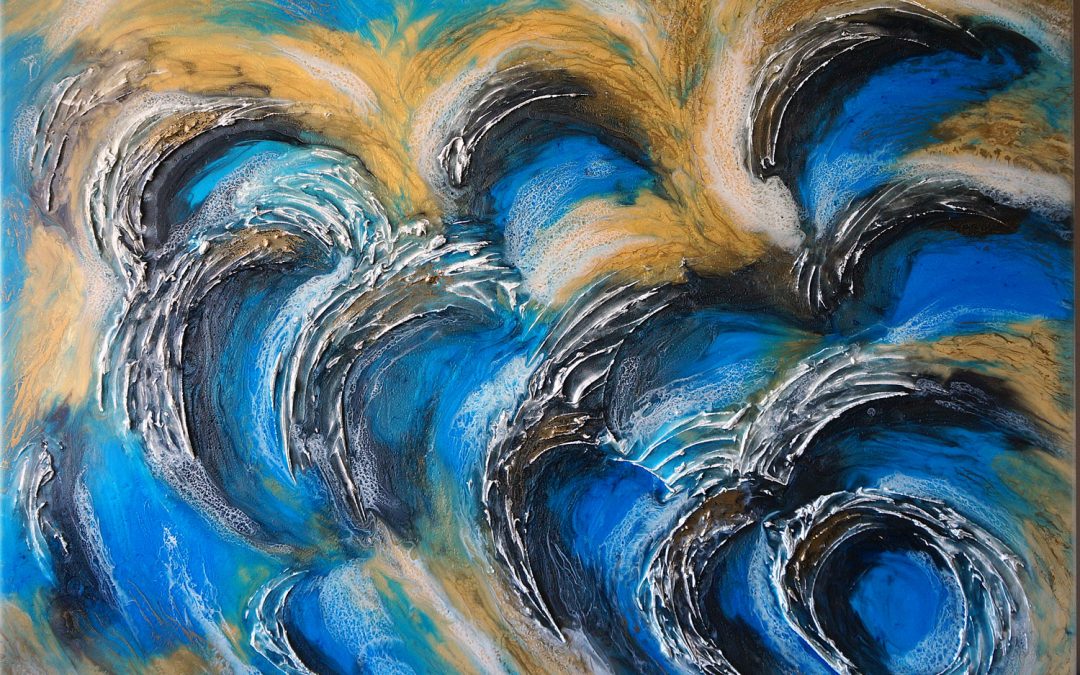
The resin is then manipulated with my fingers to move it around, always being careful to not mix it too much, so as to retain the depth of colour.
To create lacing and extra detail, white resin (with a touch of mineral turpentine), was then applied to the surface and I also added some gold spray, again with a couple of add drops of mineral turpentine, to the surface using a stick. This works very well over the lighter gold area and gives it nice finish.
For this project I used:
- MDF Cradle Board 100 x 70 cm
- Multipurpose Filler
- White Primer
- Resin from U-Resin
- Le Rez Expression Powder – Cosmic Blue
- Le Rez Expression Powder – Satin Gold
- Le Rez Expression Paste – Angel White
(Le Rez Expression Pigments are now available to purchase on my website: http://bit.ly/lerezpearl) - Artisue Powder Pigment – Steel
- Heat Gun or Blow Torch for bursting bubbles
If you would like to access to my videos before everyone else, then please sign up to my newsletter: Sue Findlay Designs Newsletter
The Essential Beginners Guide to Resin Art Techniques (eBook)
This Essential Guide will be released on 1 June 2019 priced at $19.95, however, I am giving everyone the opportunity to Pre-order it for the very low price of $9.95.
To get started on your resin journey, go to: The Essential Beginners Guide to Resin Art Techniques
*Note sales from this guide will go towards funding my YouTube resin tutorials. Thank you for your support.

I primed the back and let it dry for a few days before starting on the front surface. Using multipurpose filler, apply the texture to your board.
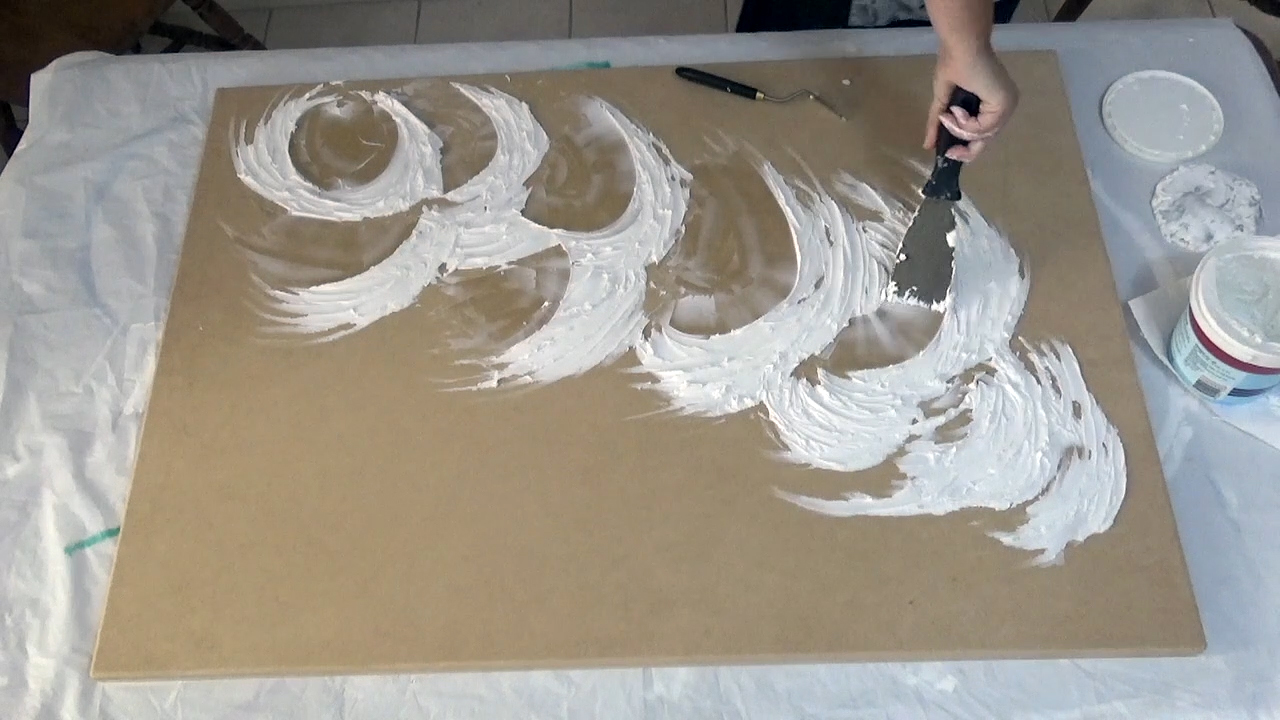
Once you are happy with the basic layout, remove any excess filler using a spatula or scraper and leave to dry according to your product’s specification. I left this one overnight.

Once dry, apply two coats of primer to the board and the texture to protect it from moisture. Once again leave it to dry, I left this for two days.

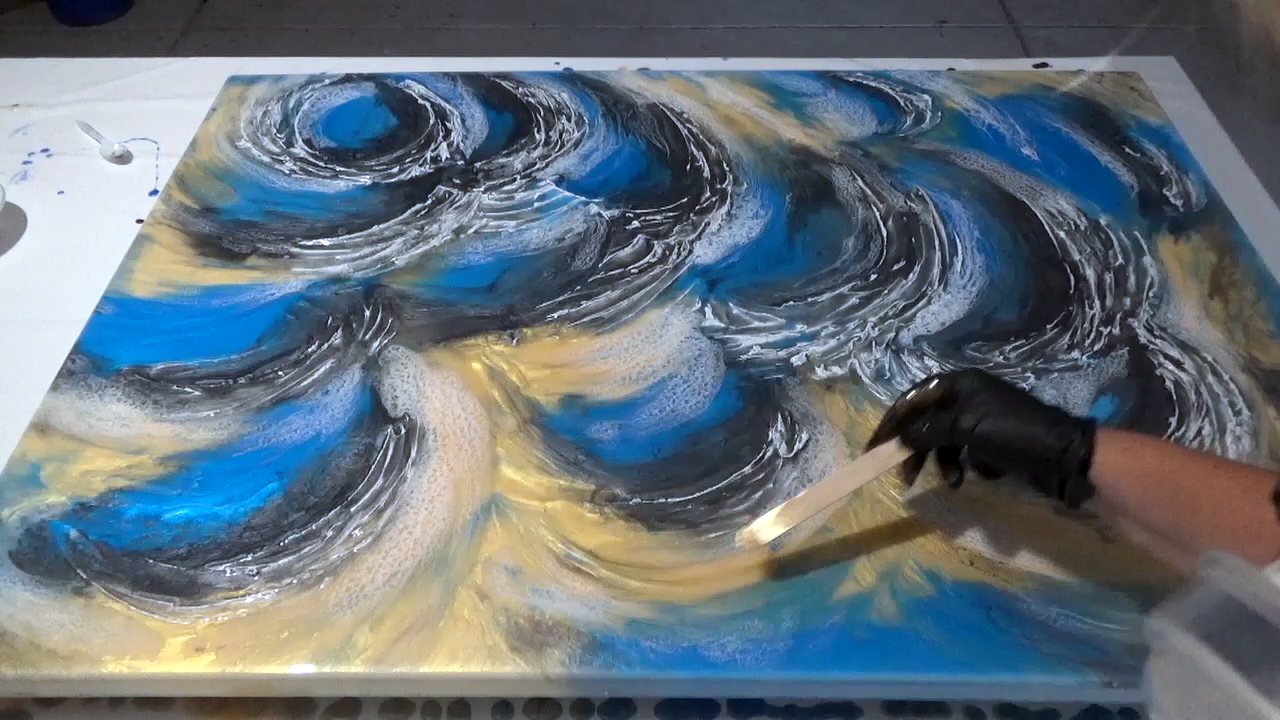
Now it is time to apply the resin. For this one, I followed the shape of the texture.

Once the resin was poured, it is now time to move the resin with your fingers. I applied a thin layer of resin on the texture, to help blend it. Don’t add to much, you want to still be able to see and feel the texture.

For extra dimension, using a stick, add a small amount of resin to the surface. I you add one or two drops of mineral turpentine, you will get a bit of lacing happening on the surface. Be careful not to use too much turpentine, it may affect the curing process of the resin.
Finally, a touch of gold spray paint has also been added to the surface, in particular over the gold resin. This adds additional highlights to the piece.
I hope this video has sparked your creativity and has inspired you to create your own Texture in your Resin Artwork.
I would love to see your creations, please join my Facebook Group: Resin and Mixed Media Art Tutorials, and share what you have made.